This week’s tutorial is going to be a bit of an extension of my previous tutorial. If you haven’t followed it yet, you’ll need to have the file, so you can either follow it here:
Or get the .blend file below here: https://drive.google.com/file/d/1vr7G-T9Q33j7QSMkUtL6L2TqxJs2QxsQ/view?usp=sharing
Tutorial
- Switch the render engine to Cycles from EEVEE.
- Disable world volumetrics by changing, under the world settings: Volume: Volume Scatter to Volume: None.
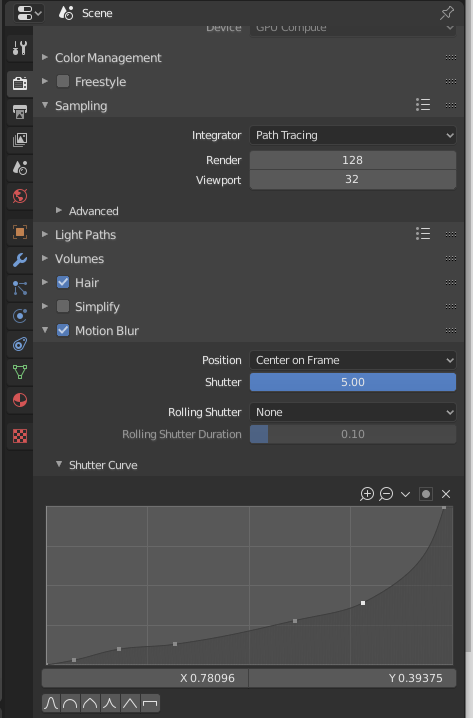
- Add a motion blur, and under the curve settings create a curve that looks like a left skewed distribution, that looks like this:
4. Go to the compositing window, and create this node setup.
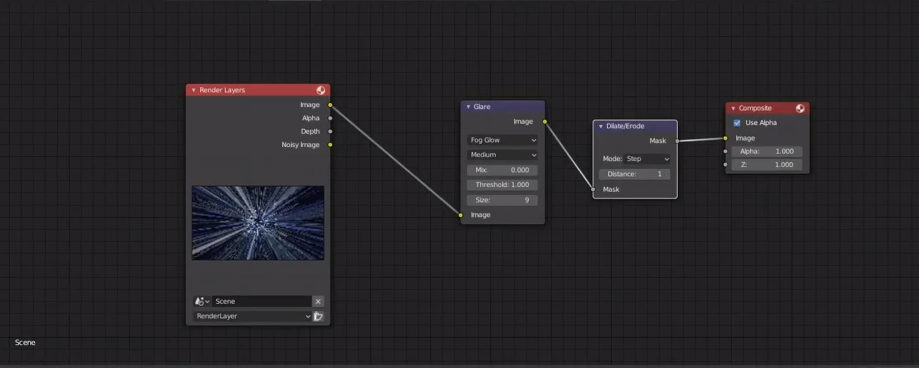
The dilate/erode node has some pretty cool uses, but for this tutorial we’ll just use it to kind of wash-out, brighten and make our image a clean black-and-white colour. The glare node will emphasize the brightness of the stars, creating a sort of glow around them.
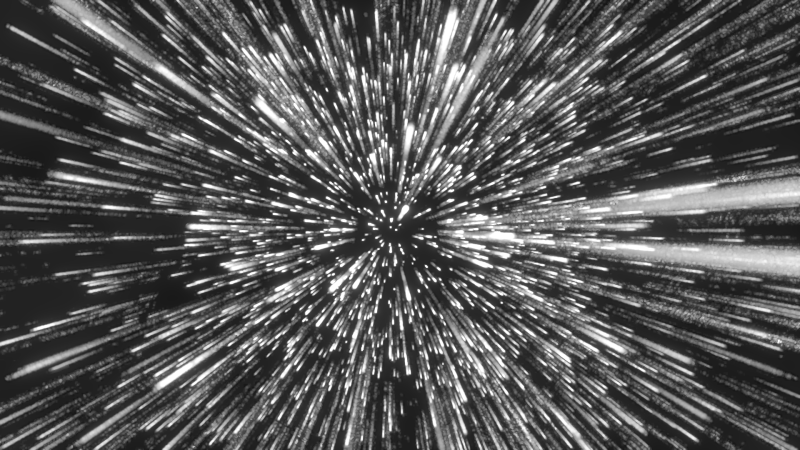
And that’s it! It’s a really easy effect, and really can show you the differences between EEVEE and cycles. Cycles definitely has a way more powerful motion blur system, and I encourage you to try switching between the two engines to explore the differences. It’s a lot of fun to experiment and perhaps you’ll find something interesting while you’re at it.
Thanks for visiting my site! If you want to see more of my work, you can check out some other tutorials, or look at my portfolio! I’ll see you next week!