Have you ever wanted to make a hyperspace-jumpy-whatever-its-called effect in Blender? Well, it was possible before, but now you can see it in realtime and render it incredibly fast with EEVEE.
The setup here is pretty simple. In summary, these are the steps:
- Set the renderer to EEVEE!
- Set up the world. You can just change the colour to a darkish blue, or add an environment texture with one of these as the HDR background. They’re milky way high-res photos from NASA. I don’t do this in the video because honestly they’re hard to see with all the effects in the way.
- Scale up the default cube on all three axes by 5x, then on the x axis by 30-40x. Now you have a big tunnel.
- Position the camera facing down the tunnel and at one end. (Ctrl-Alt-0 to set camera to view, and then you can grab it and move it)
- Add an icosphere (Set subdivisions to one for fewer geometry) and set the material as follows:
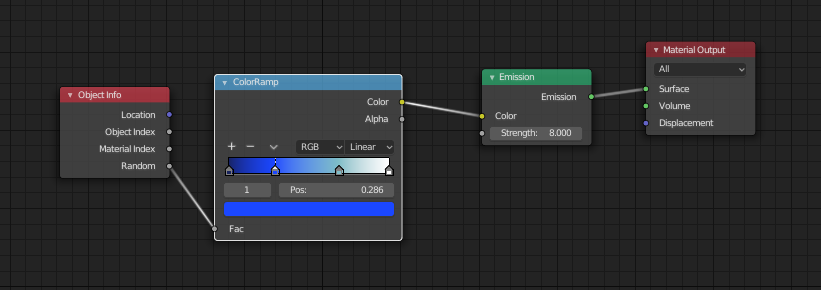
Icosphere material for random emissive colours on the colourramp. You can change the colours at the nodes to vary up the colours if you like. These are our stars.
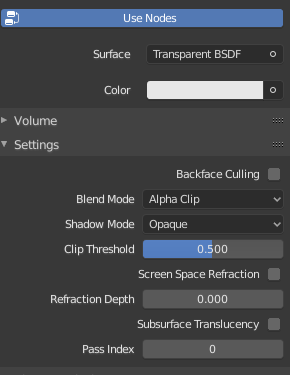
- Give the tunnel a transparent material and set the colour to full white. Under settings, set the Blend Mode to Alpha Clip.
- Create a new particle system for the tunnel, and give it these settings: Make sure you have “Advanced” checked.
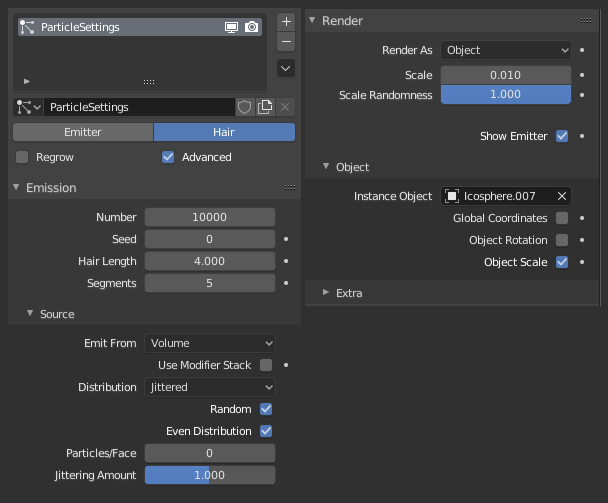
You may have to adjust the scale, and the number of particles to suit your system.
Animate the flight path of the camera.
- For the first 50 frames, move the camera down the tunnel about 1/8th the way (Slow acceleration)
- For the next 20 frames, move the camera down the tunnel a very small bit forwards (Deceleration before jump)
- For the next 40 frames, move the camera almost all the way down the end, leaving a bit of a buffer (Hyperspace jump, very fast speed)
- For the last ~20 frames have the camera move a very small bit forwards. (Final deceleration phase)
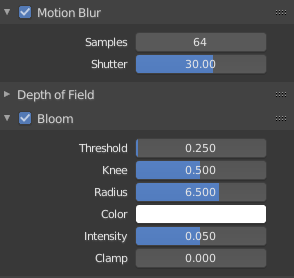
For the motion blur effect now (finally!) enable it in the Render Context Panel like this, and add some bloom too.
Render it and you’re done!
REALTIME MOTION BLUR!

