The Aurora Borealis, or northern lights effect, is surprisingly simple to recreate in Blender with an extremely basic mesh setup and a multicomponent shader. (Yes the Aurora Australis will be just as easy to make :P) Using two modifiers and basic shader construction techniques, we can divide and conquer the individual components of the aurora, and merge them together to create a stunning and stylish effect. This tutorial will go over creating the aurora mesh, and provide a node setup for the world (Making a starry night world shader) and for the aurora material itself.
If you’re a beginner, I suggest you watch the video as I’ll be explaining things in much greater detail.
Video Tutorial
How to Make the Aurora in Blender 2.8x
Mesh Setup
The “modelling” part of this tutorial involves a couple of mesh manipulations and the application of two modifiers - subdivision and displacement.
First, remove the default cube and add in (CTRL + A) a plane. Rotate this 90 degrees on the X axis (R > X > 90), and with one of the vertical edges selected, go into top view by using Numpad7 (If you don’t have a numberpad, you can enable the emulate numberpad settings in Blender’s Preferences and use the numbers above your keyboard.) Then, go to edit mode (Tab) extrude with E to extend the plane. Continue to extrude until you obtain a ribbon like shape, similar to this one:
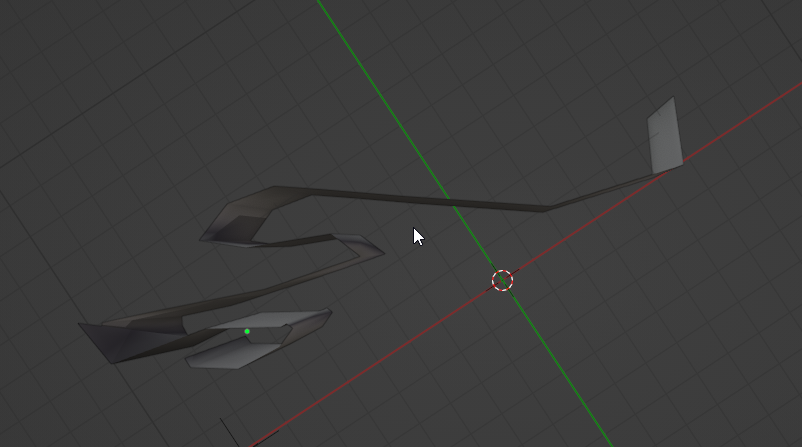
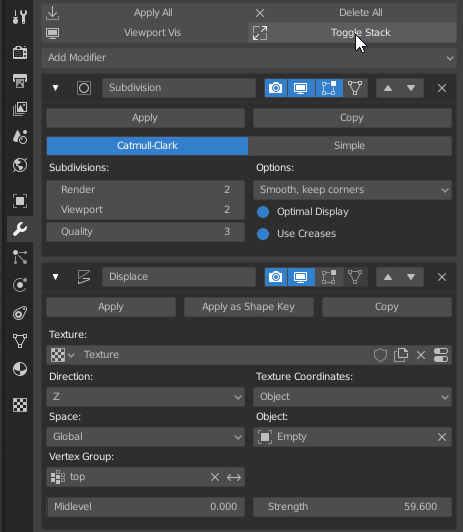
Apply a subdivision surface modifier by going into the modifiers tab, and finding the Subdivision modifier. You can set the resolution to something like 2. This will smooth out the curves.
We also want to make the top of the aurora a non-uniform shape, not completely flat, so we’ll select the upper edge of the ribbon, assign a vertex group (in the object info tab - create a new vertex group and select assign with the upper edge selected). Then give it a Displace modifier, change the effect to be on the Global Z axis, set the vertex group to the one you just made, and change the strength to whatever you want. You can set the displacement texture to a cloud texture.
You’ll also want to animate the displacement, and you can find the instructions are nearly identical to lightning animation effect in this tutorial, so you should follow steps 5 and 6 to recreate the effect. You only want to move the object target slightly, otherwise you’ll have some unnaturally violent flickering.
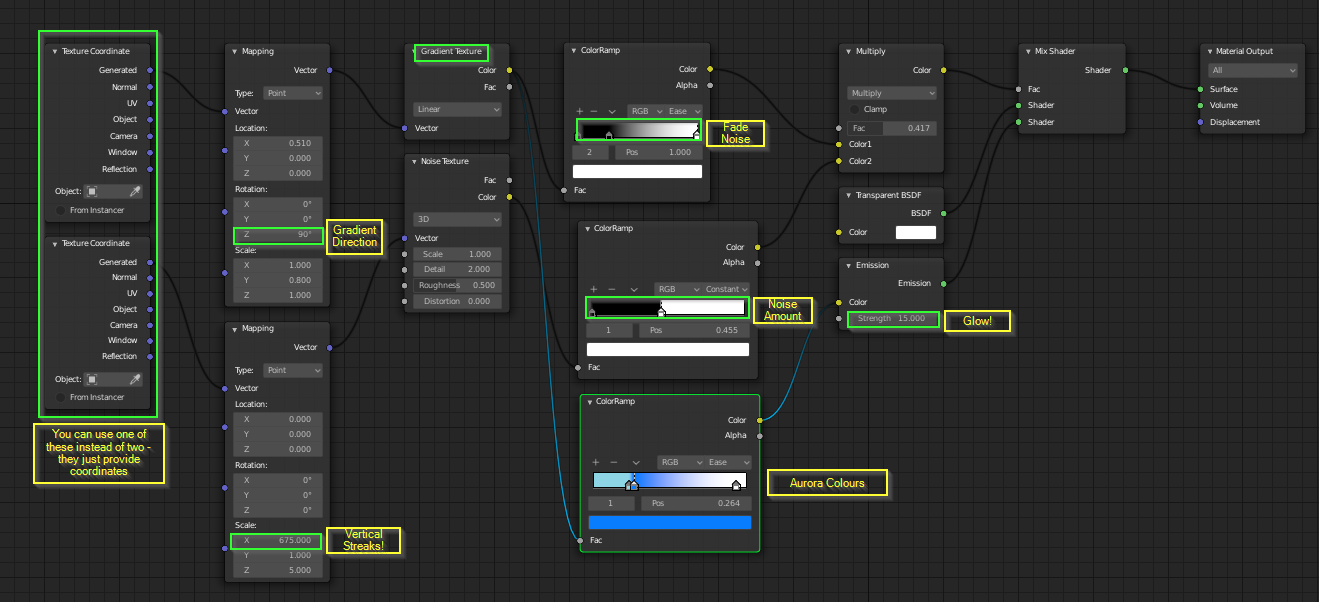
Material Setup
For a full explanation of each node and what we’re doing, you can check the video.
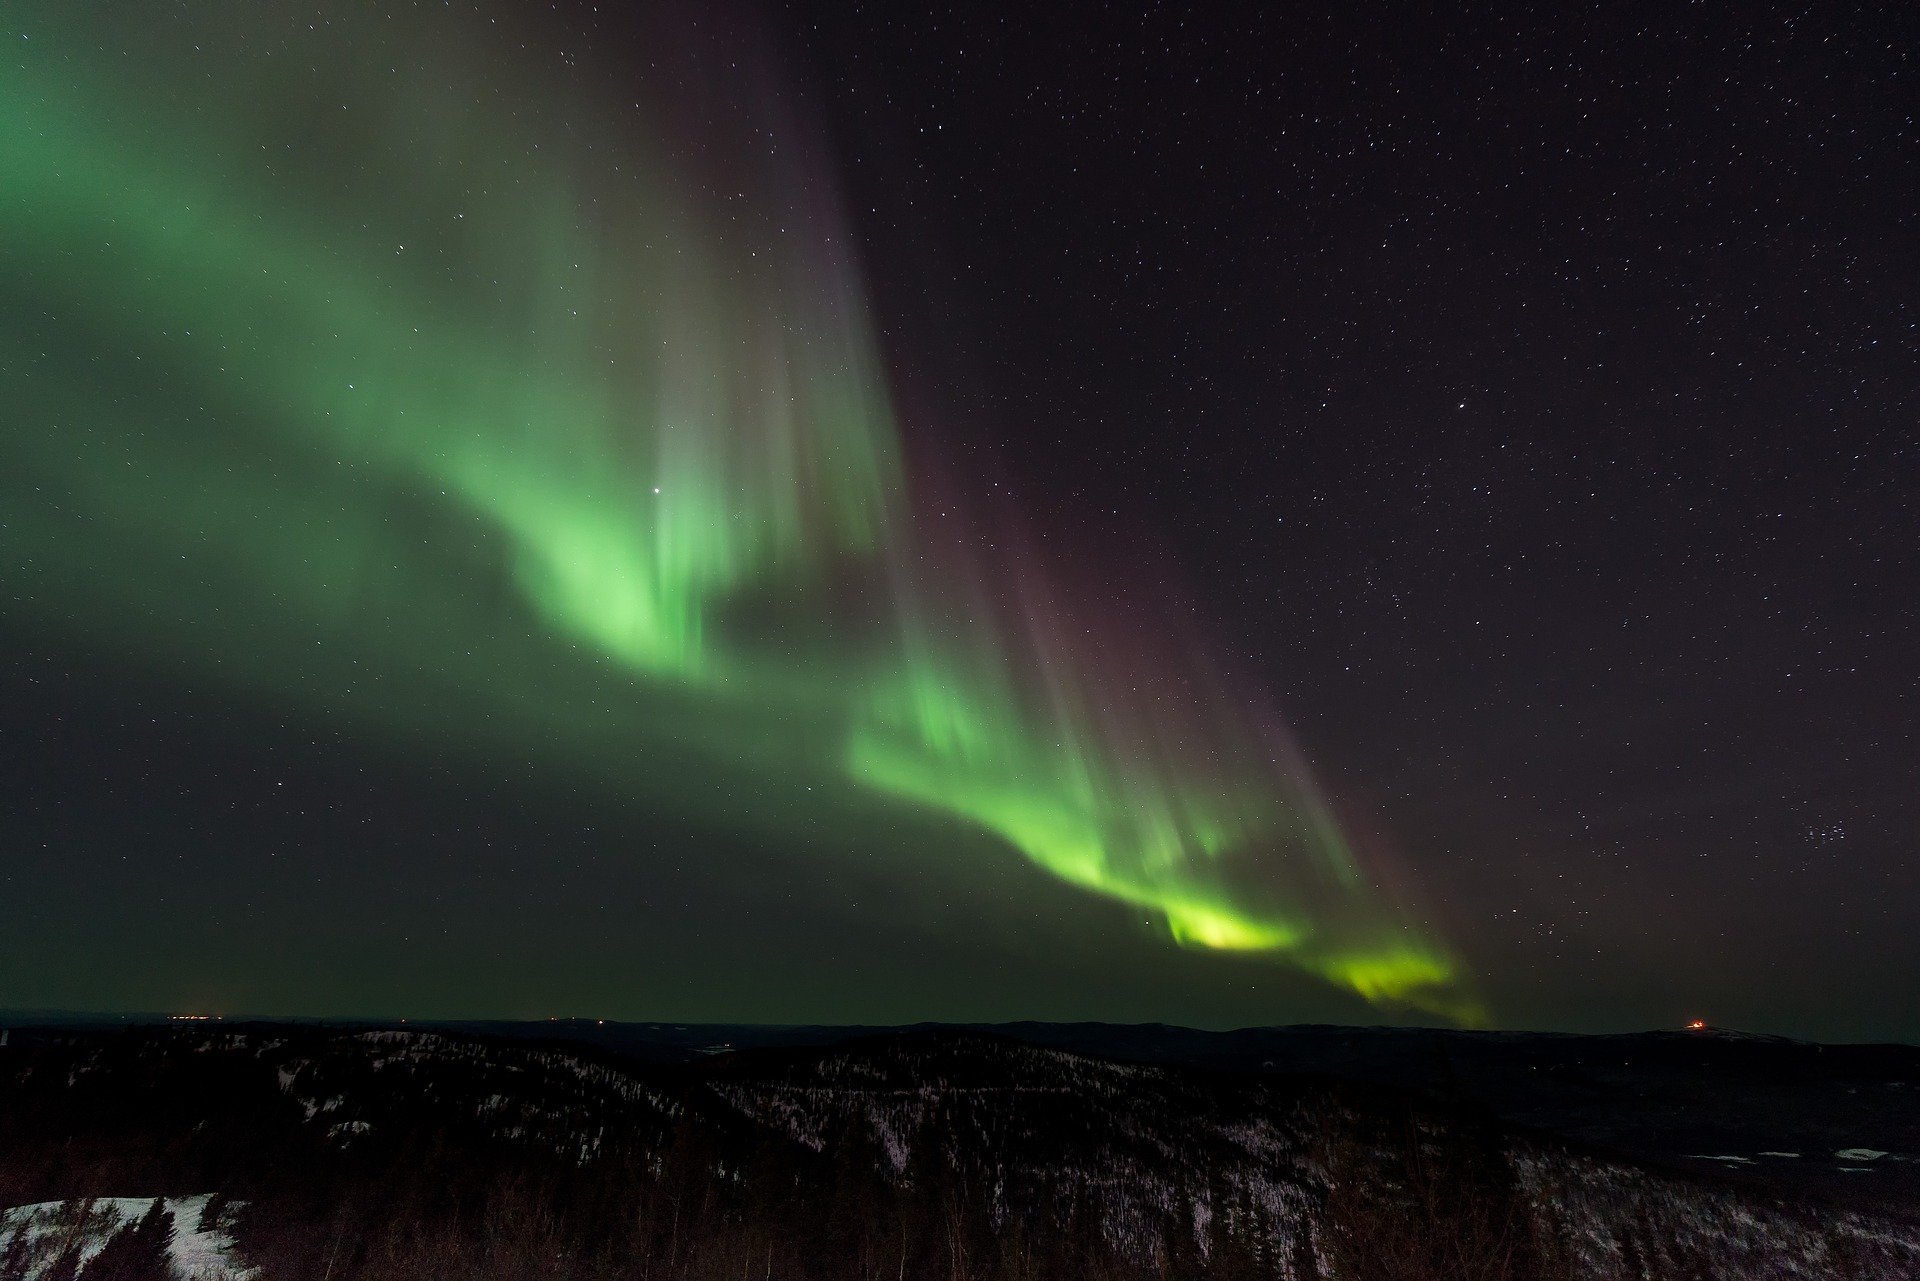
In terms of coming up with this effect - The divide and conquer approach suggests that we should look at a reference image, analyze the individual components, create each one individually, and combine them together to generate our final solution. The effects I’ll be imitating are the vertical streaks, colour/opacity/optical intensity fade in the Z direction from bottom to top and noisy fading. Much of creating shaders, particularly nonphotorealistic/toon ones comes with the problem of distilling the essential and defining attributes of a real world material and then recreating them. All these things can be noticed by careful study of the material in question - here’s a reference for you:
Here is the setup for the Aurora material (you can right click on this and view it in its own tab, and zoom in there).
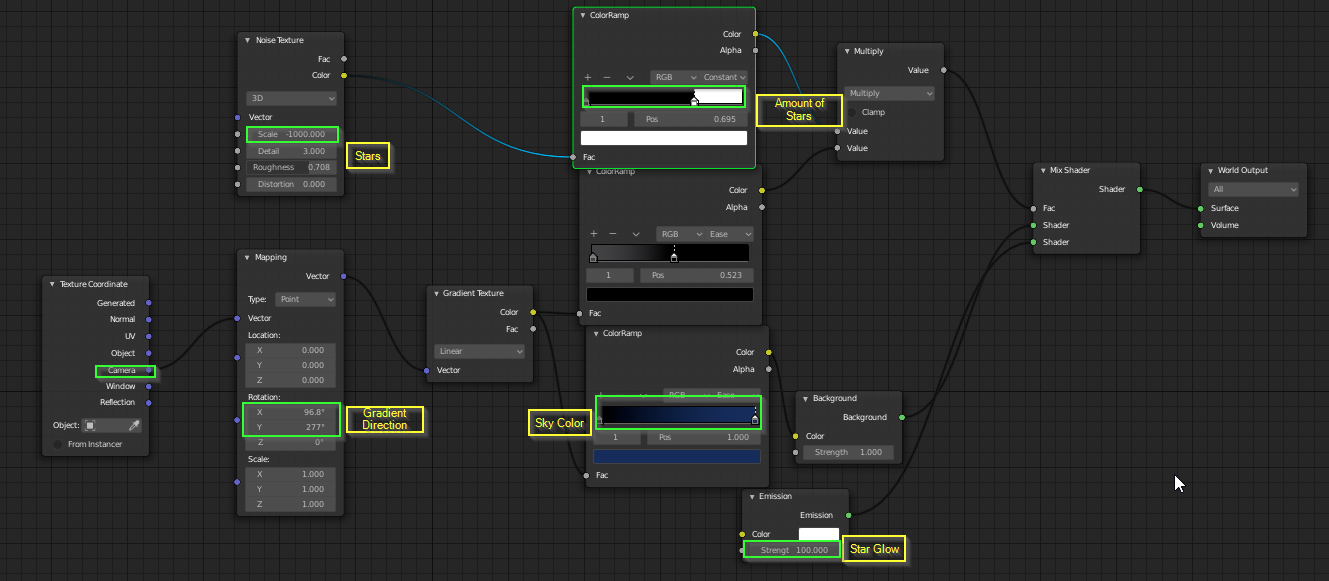
Here’s the setup for the world material - optional.
Conclusion
I hope you enjoyed this tutorial! If you found it interesting or use it for something, I’d love to hear about it in the comments below. Also, if you have any questions, feel free to leave it here or on Youtube, and I will do my best to answer it!