This guide will show you how to create and work with Blender shapekeys, animation interpolation and several other techniques for motion graphics animation in Blender.
It is a continuation of EP1: ATOMIC where we discuss basic modelling techniques, and EP2:DESIGN where we go over scene composition. They’re not completely necessary to go over if you’re familiar with basic modelling in Blender and the built in composition tools, though you can find a quick summary of the material at the links above.
This short video illustrates the concepts we’ll be using, and the final product of the tutorial.
This blog post has been supported by BenQ - check out their innovative and minimalist Screenbar Plus!
Video Tutorial
Note: This video is a rather long one, produced with a more beginner friendly approach. A summary of the important points can be found below for more experienced Blender users.
Timestamps - View the video in Youtube to use these more effectively: 0:00 - Intro 1:39 - Sponsor - BenQ ScreenBar Plus 5:12 - Intro to Animation for Blender Beginners 12:44 - Advanced Animation Effects Overview 15:38 - Motion Graphics Intro Tutorial 32:46 - Using Shapekeys in Blender 41:50 - Text Animation in Blender 53:00 - Rendering an Animation to Video in Blender 54:20 - Outro
Motion Graphics Music Link - The High Line | No Copyright Music
Text Summary
Unlike in my other Blender motion graphics tutorials, I did a small amount of planning beforehand. Here’s what my “storyboard” looks like. I made it in Krita with the European Comic template and a drawing tablet, though you could easily do it on paper.
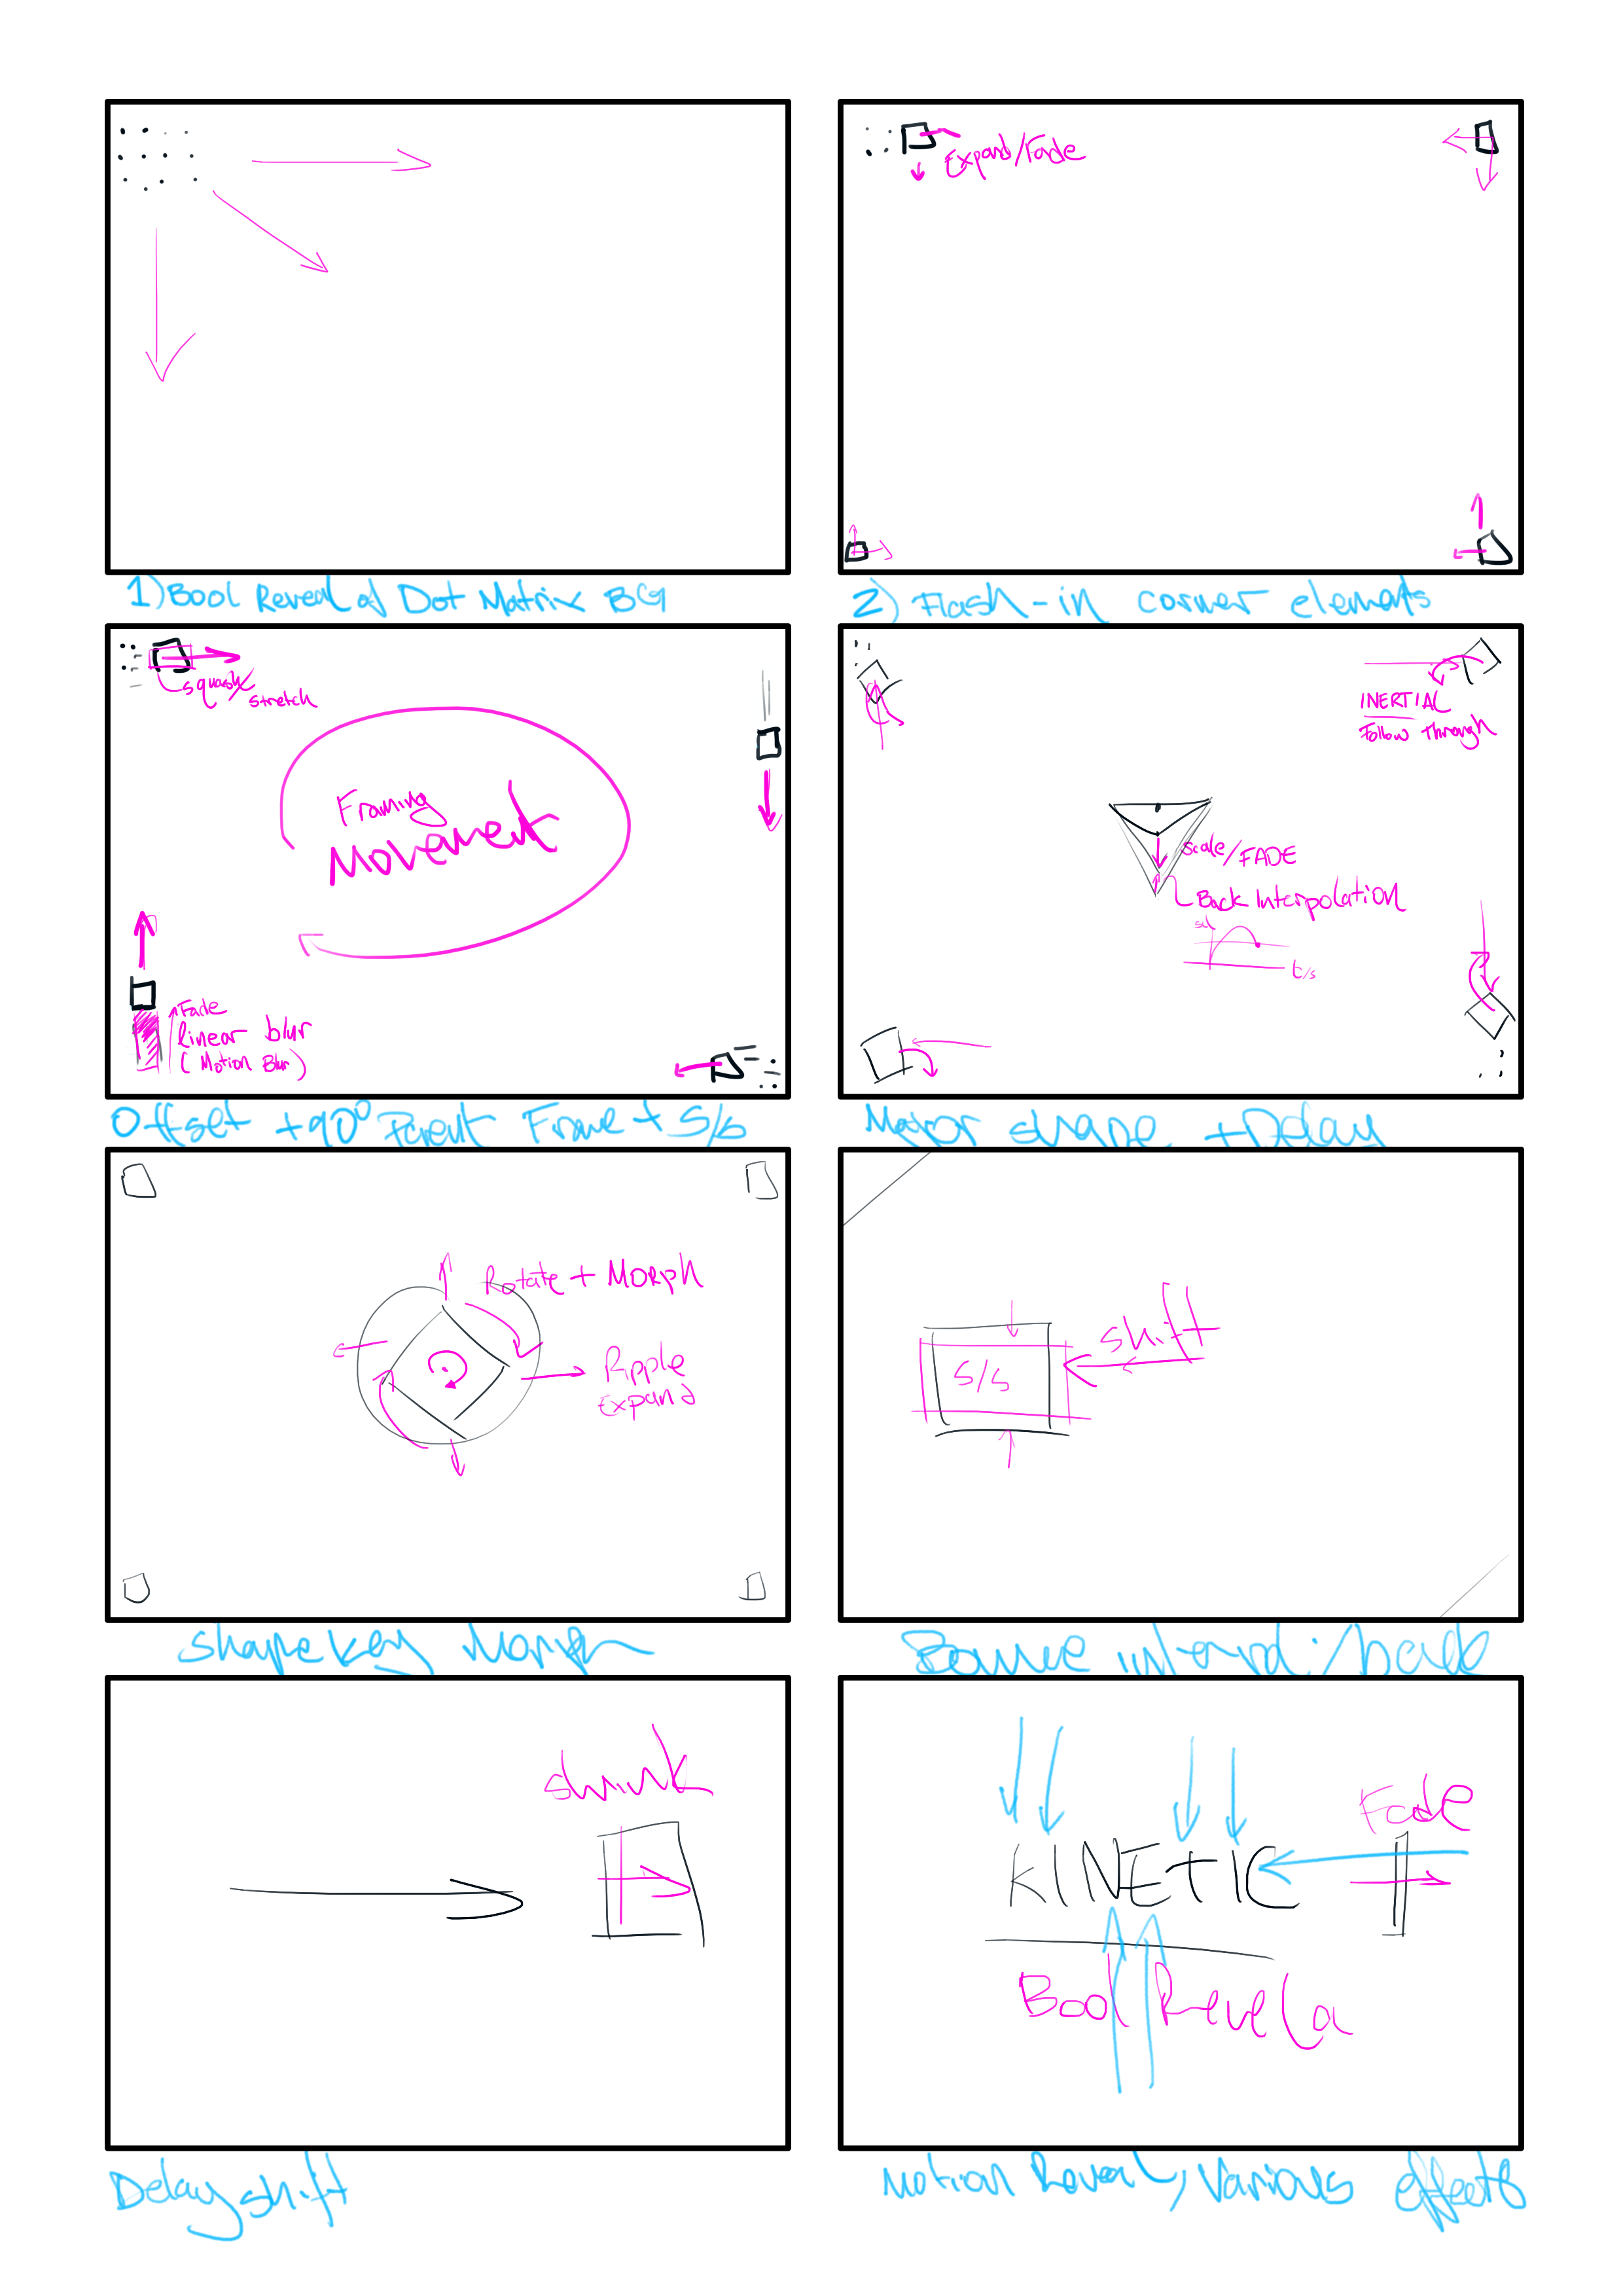
I think it’s generally a good idea to layout your motion graphic like this, though perhaps you should consult another source as to how exactly to storyboard, as I’m just making this up.
Part 1 - Animation Hacks
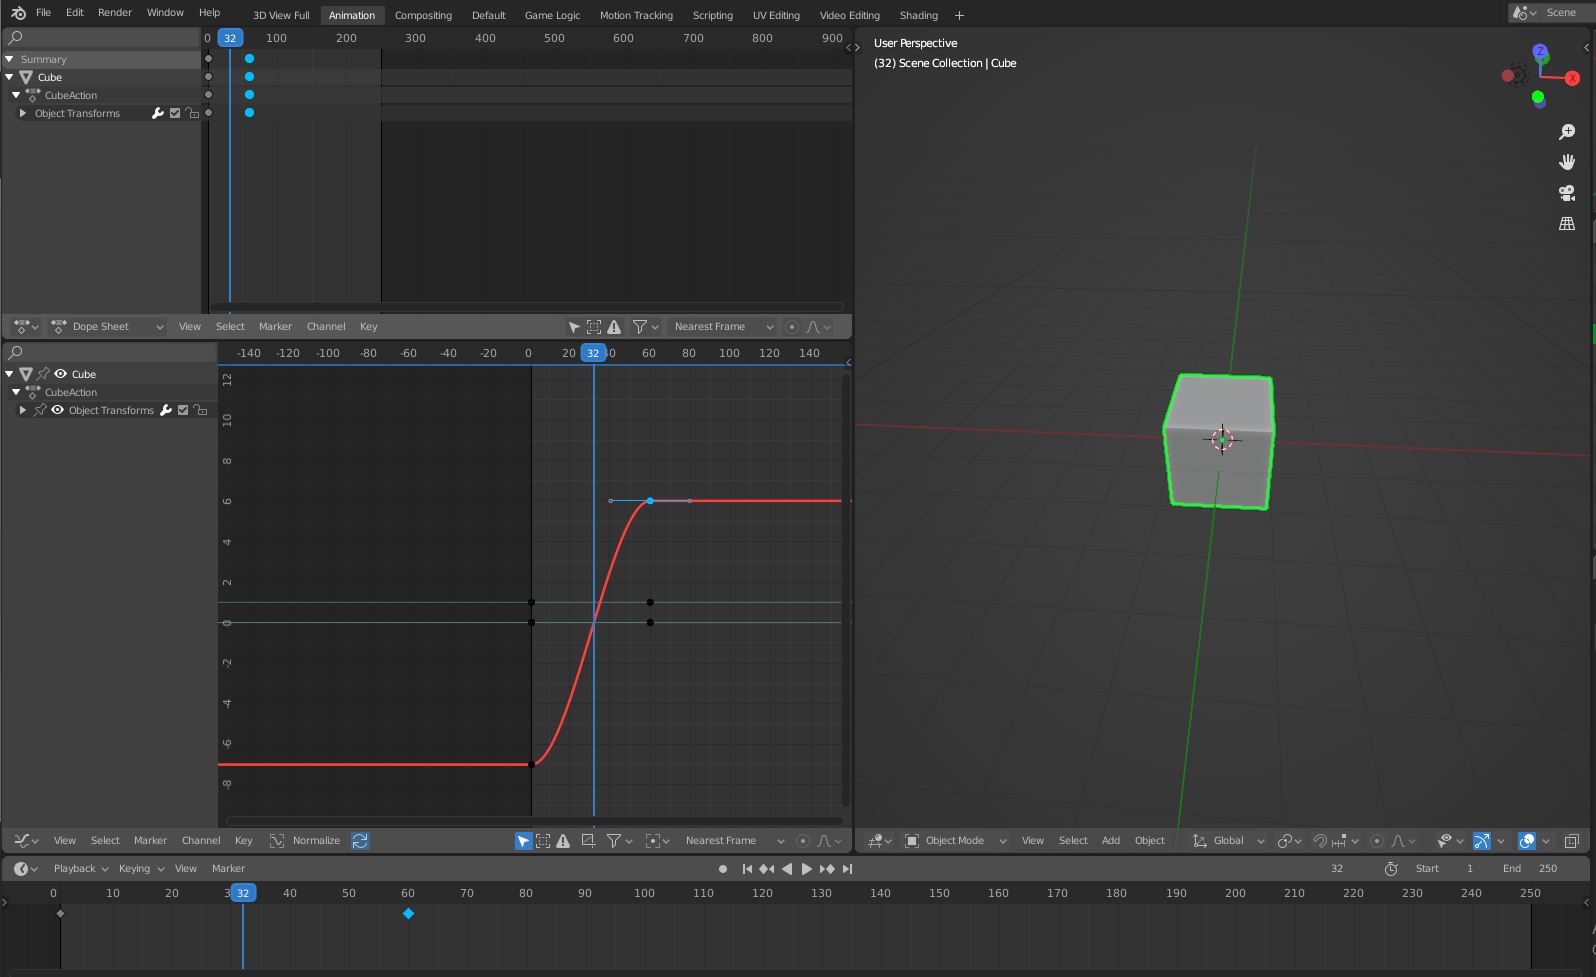
Animation in Blender 2.8x is really simple and intuitive. It works by creating keyframes for numeric properties, generating a snapshot in time, and then interpolates between those snapshots over a defined period of time. You can hit i over 3D viewport to keyframe a variety of transform properties (rotation, location, scale), or with your mouse over nearly any numeric property in Blender to place a keyframe at the current frame.
I’ve keyframed the position of the cube below to move on the X axis, and this is what the standard animation curve looks like. By defining a start point and end point, Blender creates a smooth curve (easing) between them.
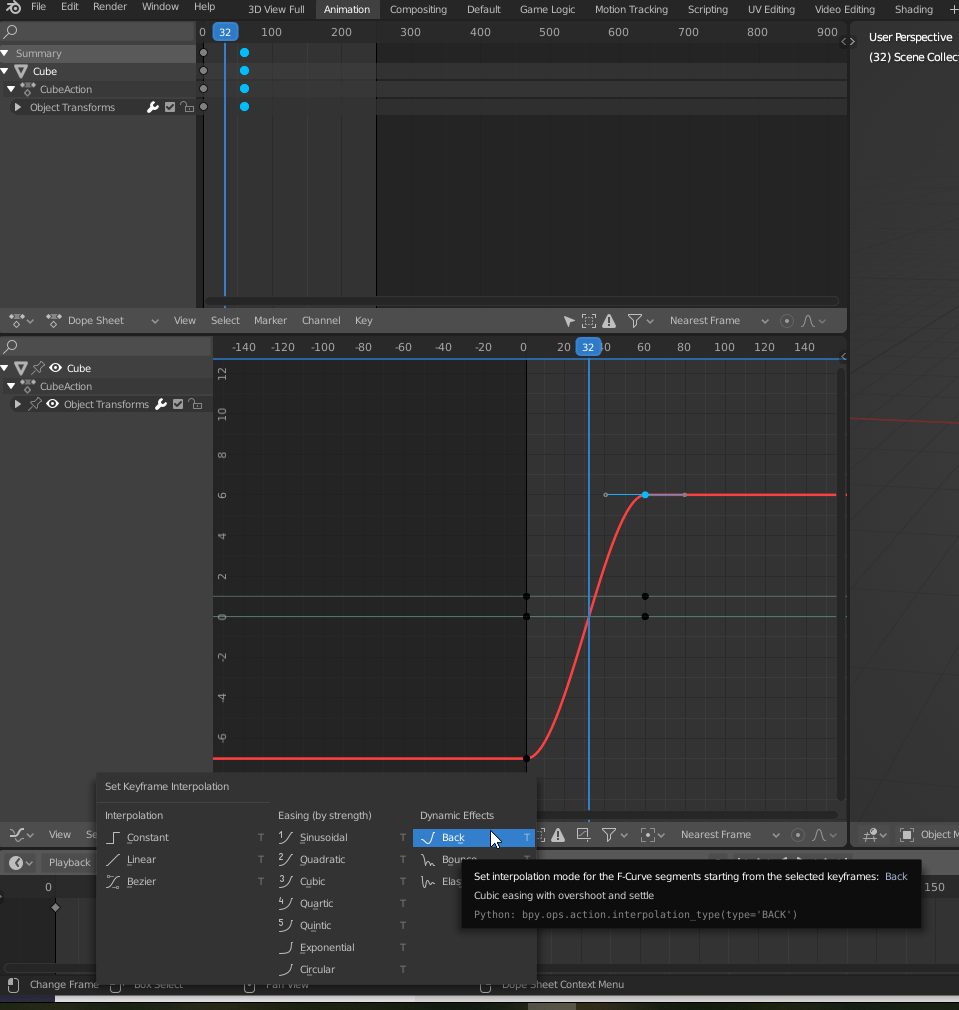
Now we can change the parameters of this easing, and even apply special mathematical interpolations that create simple effects with only two keyframes. Those are bounce, back and elastic. You can access the Keyframe Interpolation Menu by hitting t with your cursor over the timeline (which I use most often) or over the f-curve editor as seen below.
Then we can set up the interpolation however we want. This is the bounce interpolation applied to the same two keyframes.
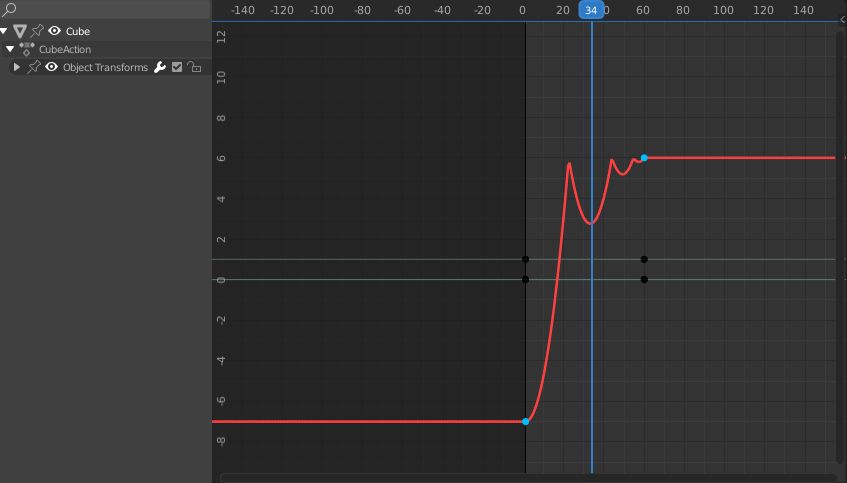
Bounce and Back will be very often used in motion design. Sadly, I don’t think blender has an option to define custom interpolations, but that may be rectified by an addon.
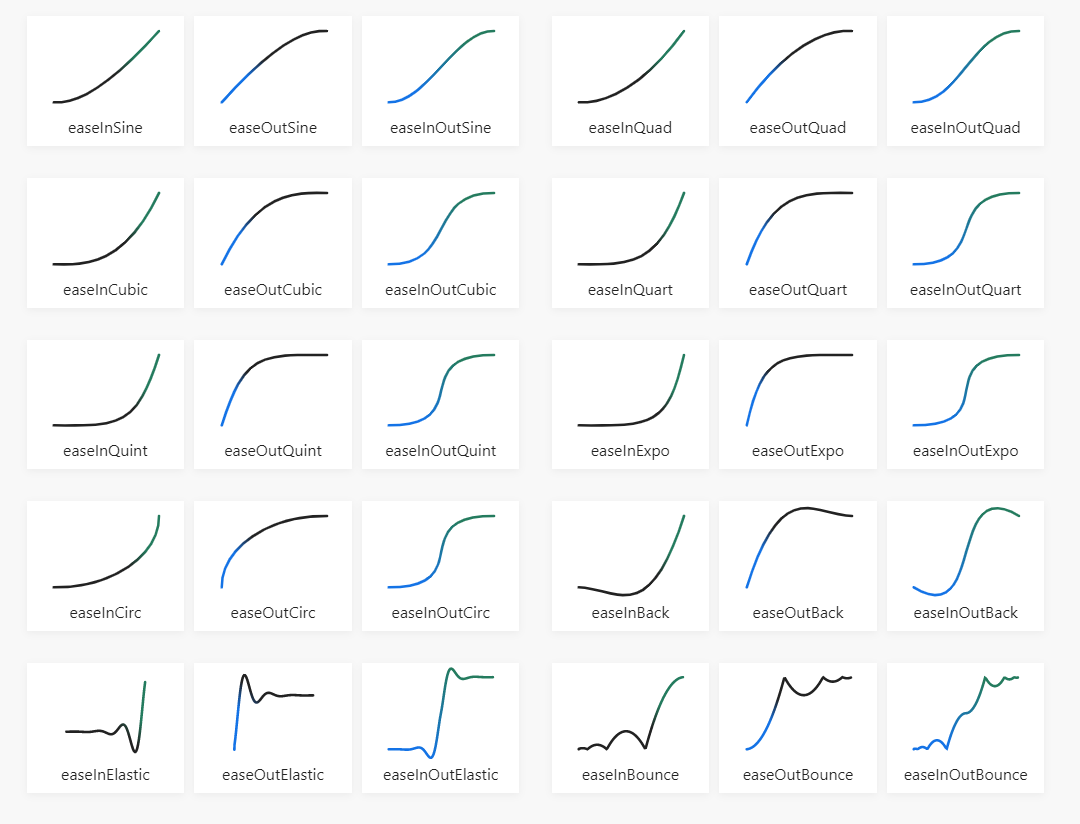
Check out this cool website (easings.net) for a ton of easing curves to visualize this better. The website is shown below.
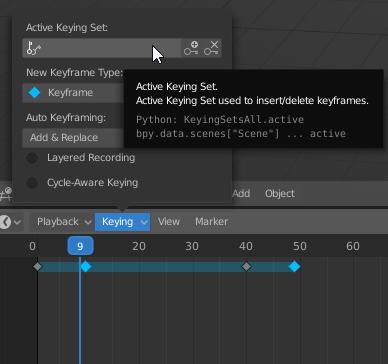
Additionally, to speed up your workflow, we can set up Autokeying. Instead of trying to find keyframable properties in a menu, you can rebind the i key to set a specific keyframe, often LocRotScale. The menu can be found in the Keying Properties.
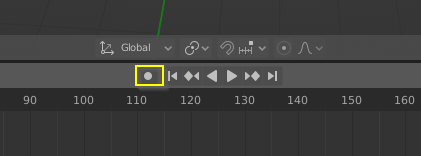
To automatically record every animatable/keyframable property, you can turn on Record Keyframes. Use this cautiously, as you may end up making a mess if you, for example, move an object while the animation is playing.
Part 2 - Shape Keys
Shape Keys let you animate the mesh itself - and can create some really cool shape-morphing effects that are otherwise impossible to create (or would require an insane modifier stack!) They’re simpler than armatures to set up and require no rigging, but they are also much less flexible and are only really useful for simple morph effects, like we’ll be using in most motion graphics.
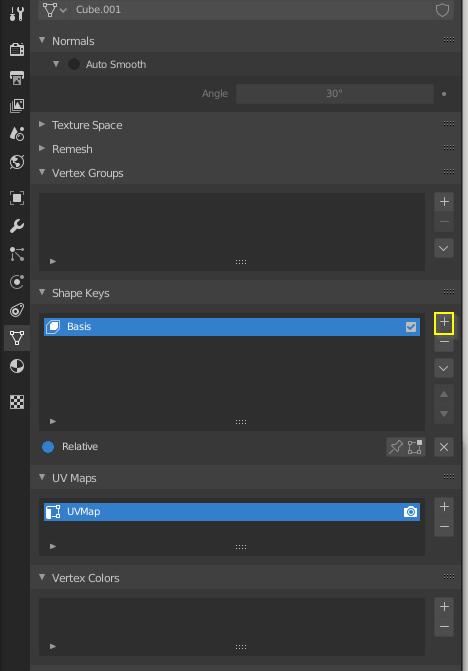
To use shapekeys, go to the Object Data Tab and add a basis key by selecting the plus button in the Shape Keys menu. This is the default, idle, or neutral state of your mesh.
Then, to create a shape morph effect, create another key by selecting the plus button again, and name it. These can be used for facial poses or other simple deformations. With that key selected, go into edit mode and move some vertices around.
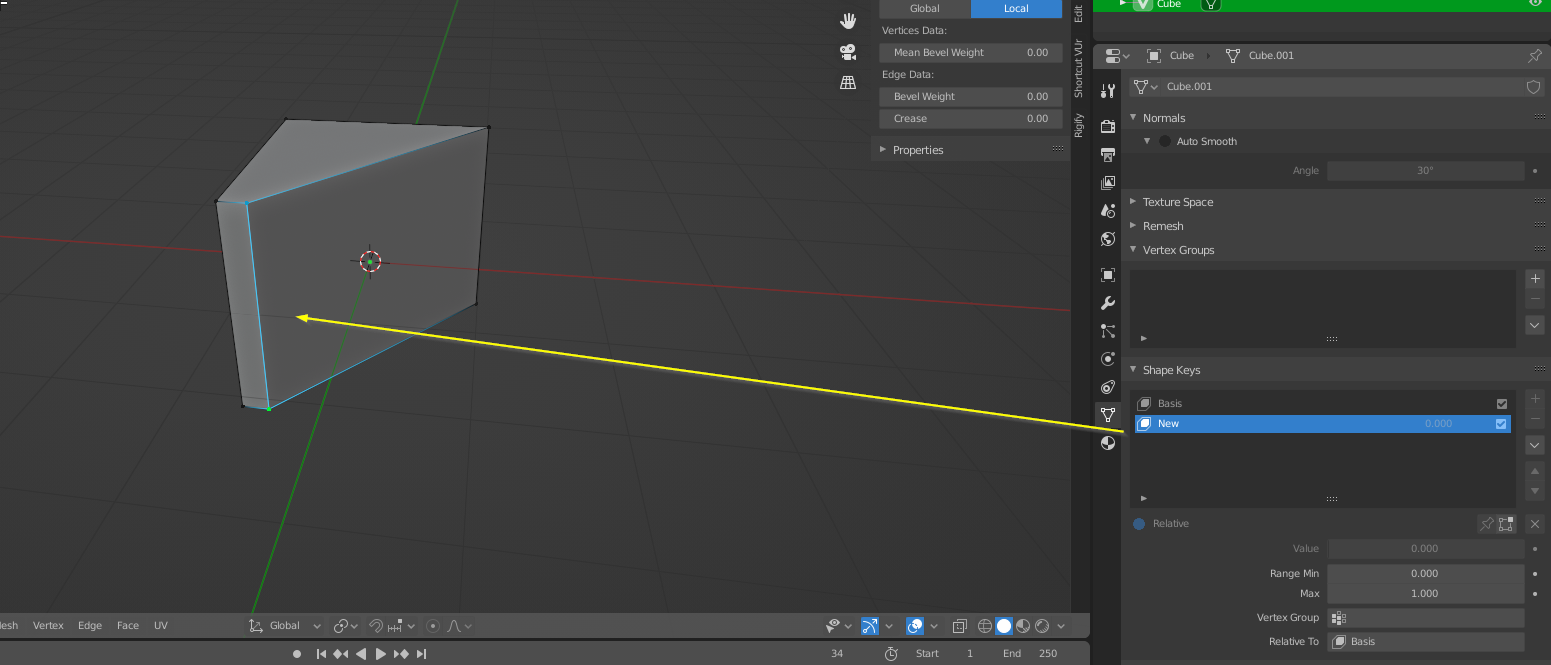
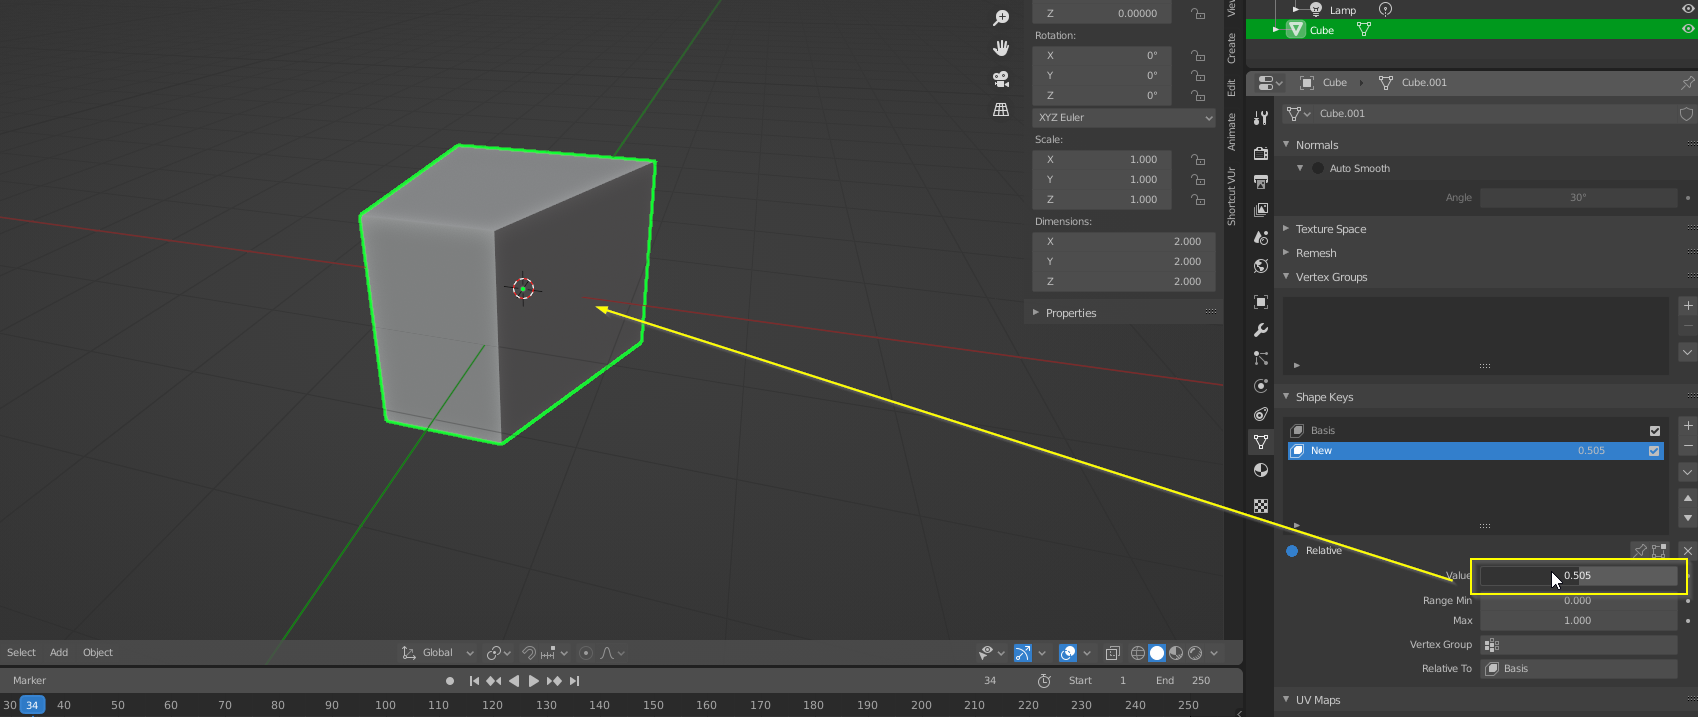
Then, if you go back to object mode, you’ll see that the mesh reverts back to the Basis shape. This is because each shapekey has an “influence” on the mesh’s final form. If we have the influence of the “New” shapekey at 0%, then it won’t have any effect on the form of the model. To change this, edit the Value parameter shown below. Now, we can animate this property to create a morphing effect, by hovering the cursor over the Value parameter set to zero at frame zero and hitting i to apply a keyframe (it should change colour), then going to frame 100, setting the Value to 1.00, and hitting i again to apply a keyframe. Now if you play the animation, you should see morph effect in action!
Part 3 - Empty Parents for Animation Reuse
In order to create repeated and delayed effects (you can drag keyframes markers in the timeline now!), you may want to utilize empties. If you’ve already keyframed the position of a moving shape, you won’t be able to simply duplicate the object and delay the animation, as they’ll overlap. Instead. you want to create an empty parent (select the shape, then an empty, and Ctrl + P > Object), and this will permit all your animated transforms to be calculated relative to the empty rather than to the world, so you can, for example, lower the empty or rotate it 90 degrees and move it to reuse the animation or create a “stacked” effect.
This is rather difficult to explain over text, so I suggest you watch the video if you want detail on this.
Thank you for visiting this tutorial, and I hope you learned something new! Follow me by subscribing to my Youtube Channel to check out other high quality Blender and Unity tutorials.
Also, thanks again to BenQ for supporting my content! You can find links to their ScreenbarPlus E-Reading Lamp below: