A great way to add visual flair is with Blender’s powerful compositing engine. Using it, we can create an immense amount of visual effects on top of a completed render, video clip or image, including various glitch effects, lens distortions, pixelization, scanlines, chromatic abberation and colour grading.
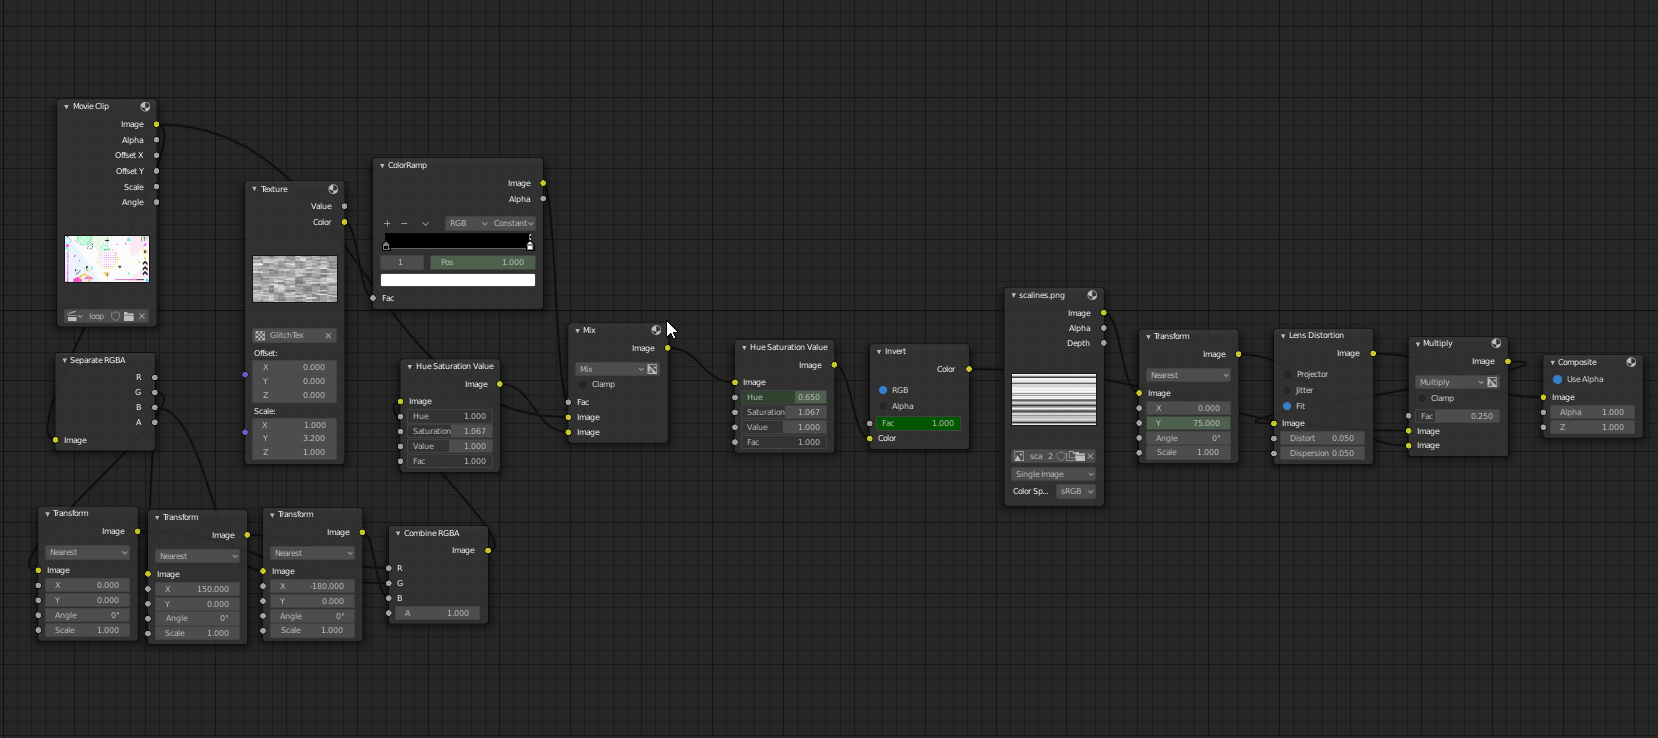
The suite of available features can be rather overwhelming, so I made a video about adding effects one by one to create (and understand!) this nodetree. These things can look complicated at first blush, but once you build them up incrementally, you’ll see that it’s not that hard at all!
The video below is suited for beginners, though my audio quality is unfortunately a bit damaged due to recording with OBS. I will fix this in future. It will be presented as a Q/A.
If you haven’t found the other parts of this tutorial, please check them out below. 1. EP1: ATOMIC where we discuss basic modelling techniques 2. EP2: DESIGN where we go over scene composition. 3. EP3: KINETICS where we learn basic and advanced animation techniques.
For those looking for resources, please scroll to the Text Tutorial Section and Download them.
Video Tutorial
Timestamps + Effects We’ll Be Making: 0:00 - Intro
0:41 - Looping Animations with VSE
3:50 - Importing Source Material
4:30 - Abuse of Default Cube
4:35 - Scanlines
9:15 - Using Nodegroups
10:00 - Lens Distortions
12:15 - Colour Inversion/Animating Effects
14:00 - HSV Modulation
15:45 - Glitch Effect
23:30 - Advanced Glitch Effect
27:15 - Rendering Animations to Video
27:26 - Series Recap and Outro
Text Tutorial
The text portion of this tutorial is for advanced users who already know blender’s VSE and compositing to a small degree and are willing to piece together the components themselves.
Q: How do I Make an Infinitely Loopable Video using Blender’s VSE?
Download the Source Video Here: Google Drive link
A: One way is to play a video forwards, then in reverse. (Ping-pong Effect) This is very simple to do with the VSE - Just duplicate a clip and place it adjacent to the original, and then under the clip properties, find Video > Reverse Frames.
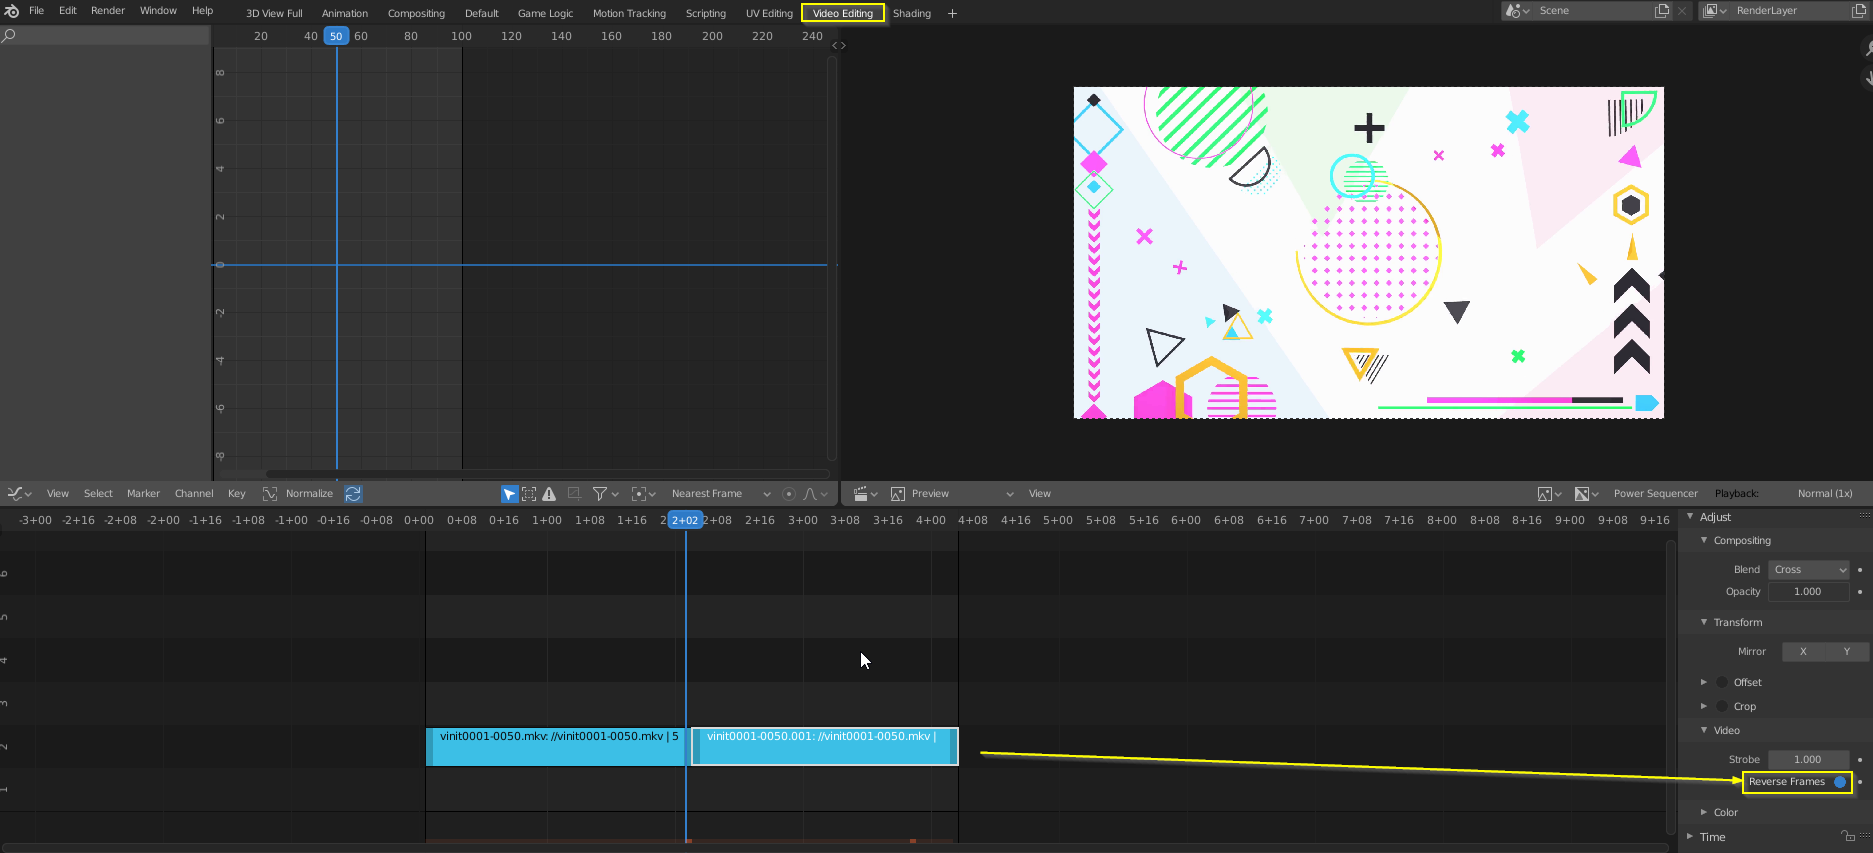 Creating a ping-ponging loop.
Q: How do I make a Glitch texture to use as a mask, procedurally?
A: Create a cloud texture (or most texture types with Cell Noise will work) and set the Noise Basis to Cell noise. Then, apply a constant 50⁄50 B/W colour ramp (which you can animate to modulate the intensity of the glitch), and plug it into the factor input of a Mix Node, combining your original image and a modified image (which you can modify via translating it, inverting colours or any variety of modifications).
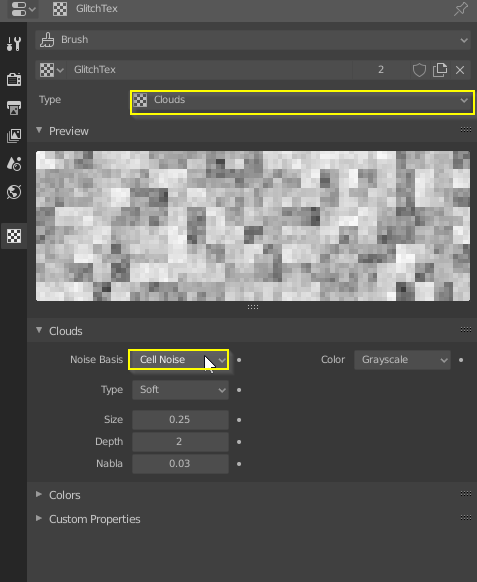
The glitch texture.
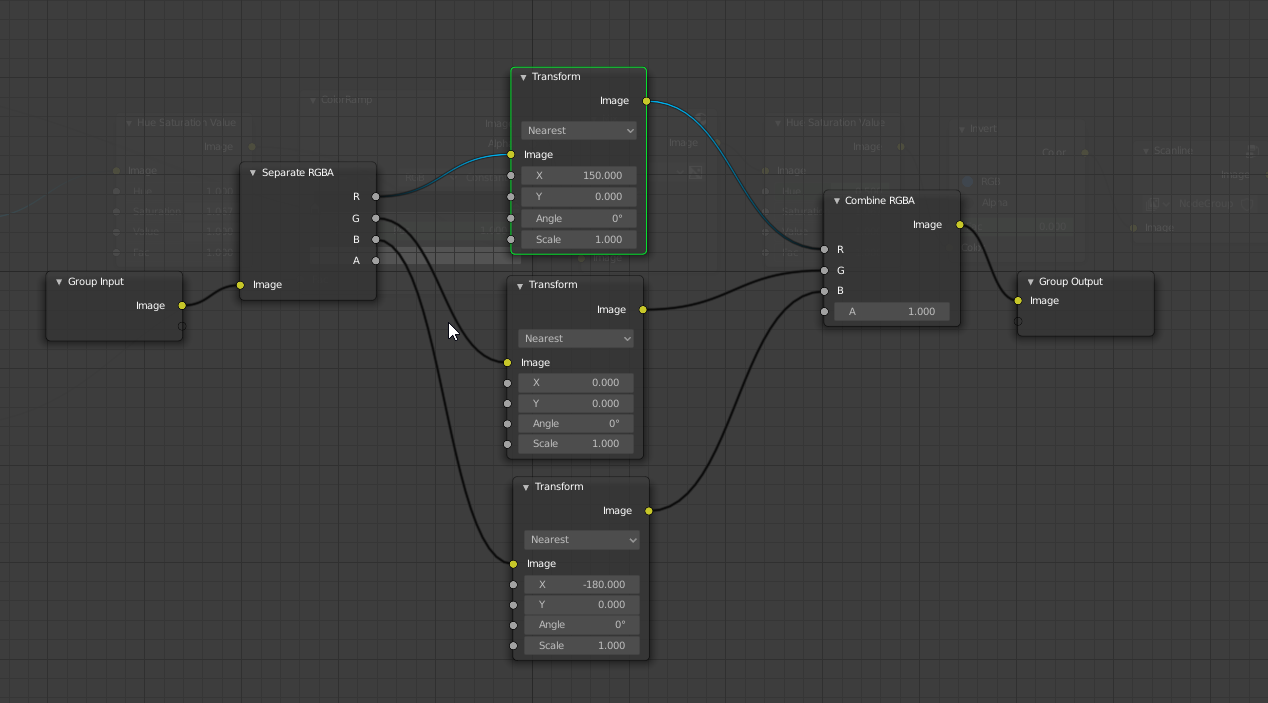 One possibility to alter the original image to create the glitch layer - Split and Recombine the RGBA channels, but translate each of the R,G and B channels differently.
Q: How do I add Scanlines?
First, Download the following image, which took me one minute to make in Inkscape. Yes, you can do this procedurally in Blender. No, it doesn’t make sense to do so unless you’re trying to learn how to procedurally generate textures that are much more easily made in a vector graphics software.
Download this! Right click > Save Image As …

A scanline texture. Use however you like. Sell it even, I don’t care :)
Then, plug it into this nodegroup, which will be spliced in the final nodetree. It’s mixed with the movie clip output. Please look at the nodemap at the start for reference.
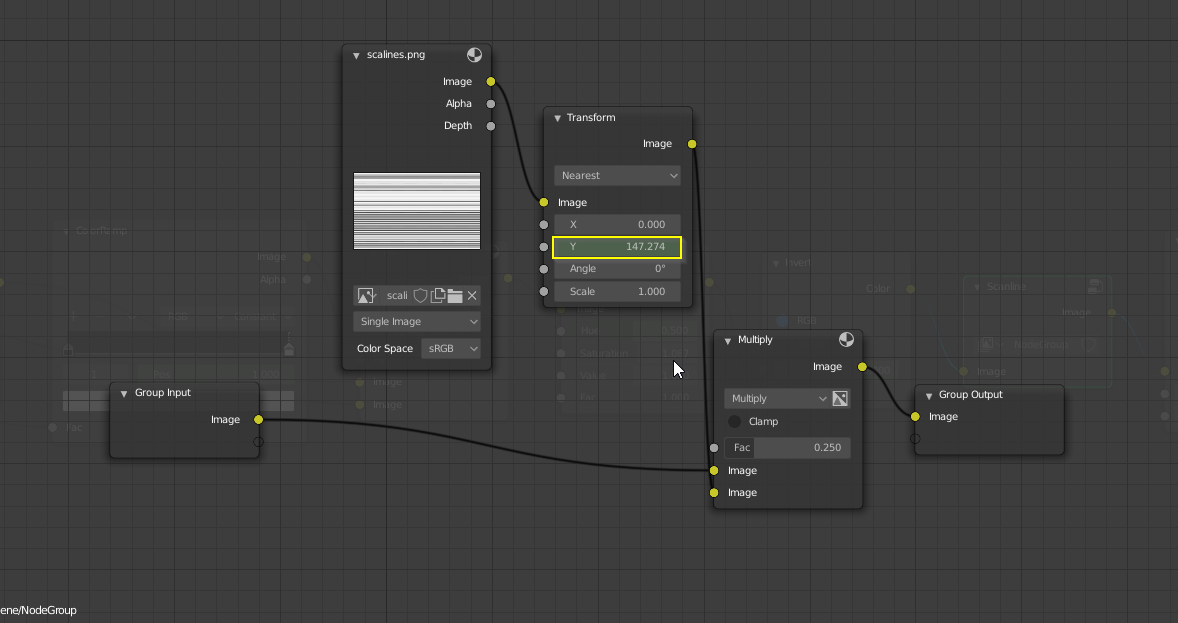
The scanlines node group. The Transform node has an animated Y coordinate so the scanlines appear to scroll up.
Q: Can I see the Nodes again?
Yes, yes you can.
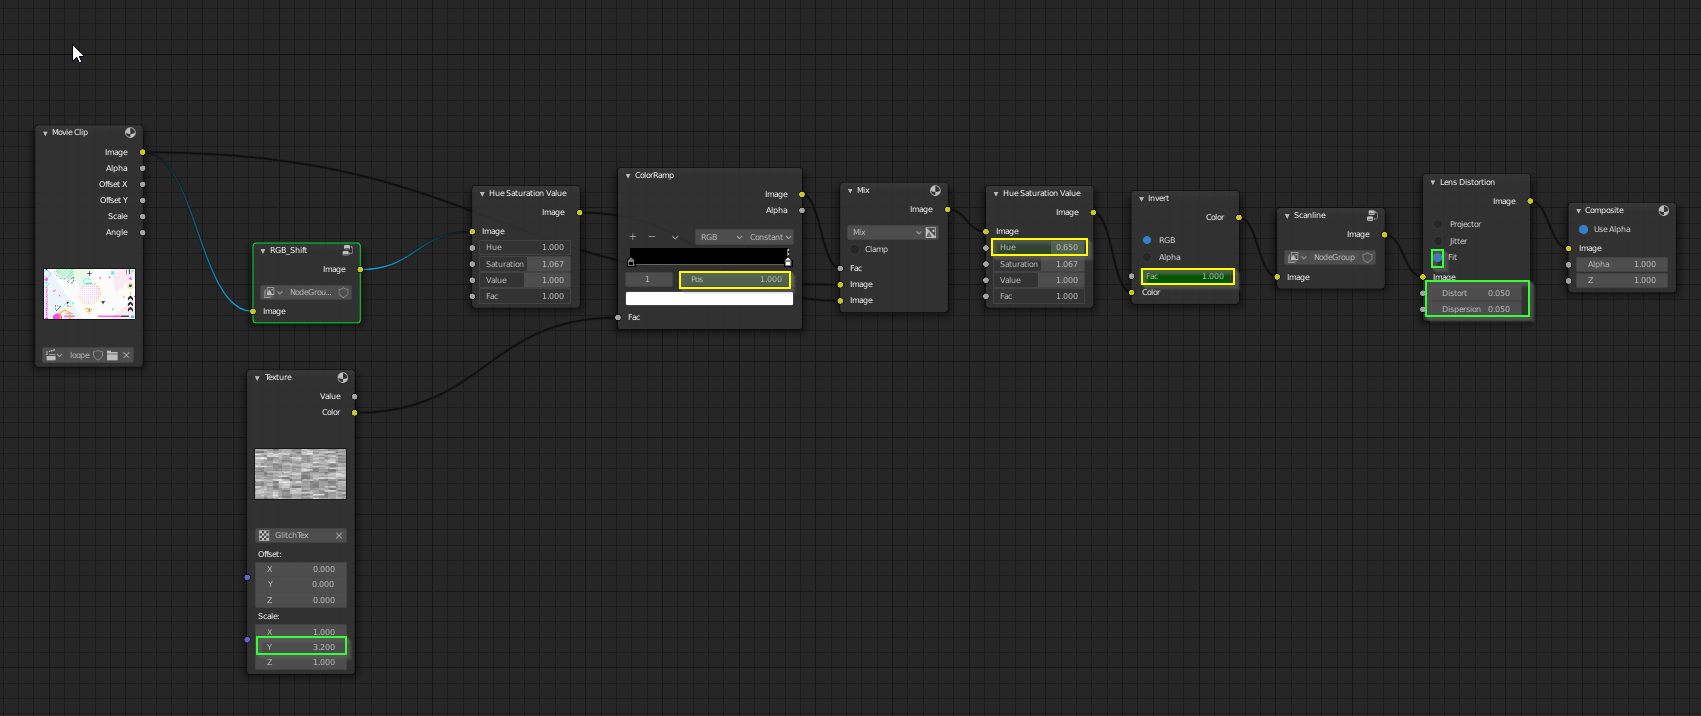
This version has the RGB shift glitch effect and the Scanlines condensed into nodegroups

This version has zero nodegroups.
Conclusion
Thanks for reading this, and for coming so far through the elements of motion graphics! I hope you learned something new and can put these techniques to good use. Best of luck!