Hi! This tutorial will focus on creating a glitch/hack effect in Blender 2.8 procedurally, using Cycles and a free software called Jsplacement.
Video for more visuals and details:
Text tutorial starts here:
Start by downloading Jsplacement here : https://windmillart.net/?p=jsplacement
Create a dotgrid map that looks like this:
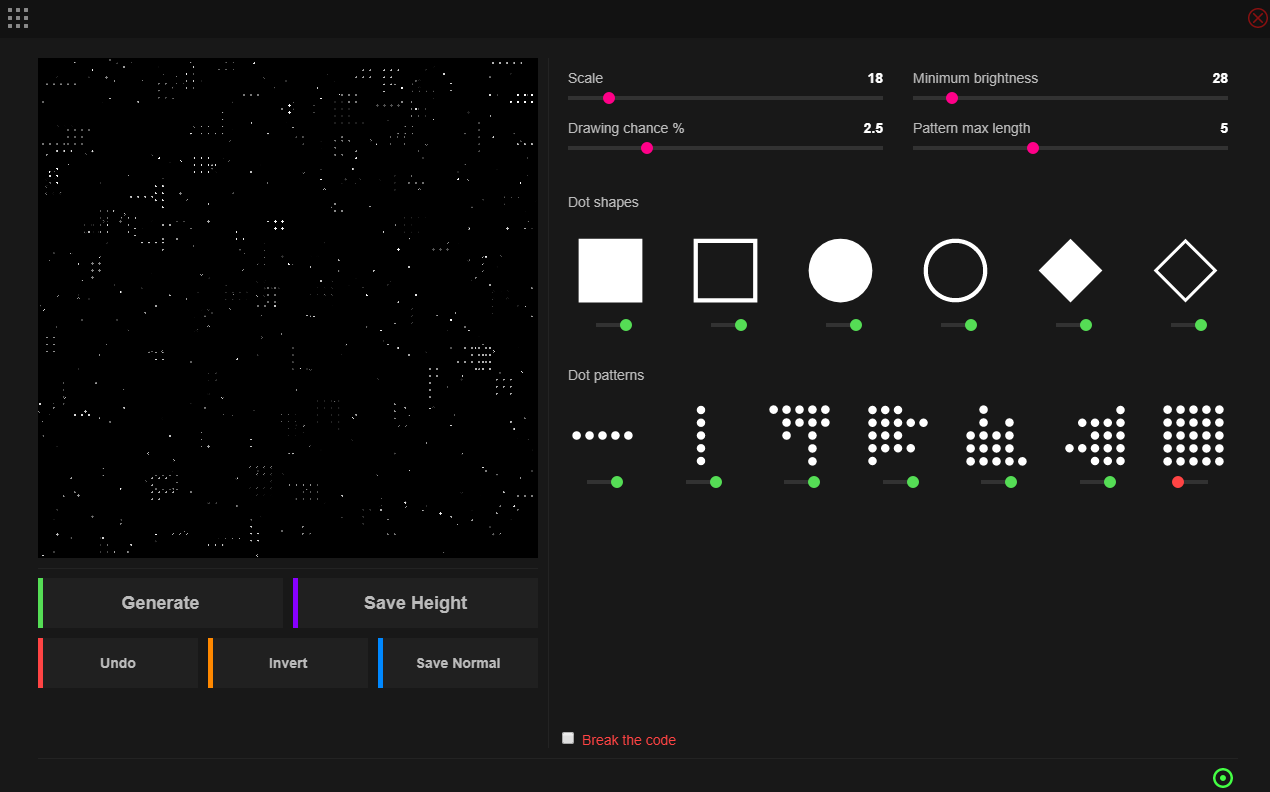
And save it as a heightmap (Save Height) somewhere you can find.
Import this grid into blender by Add > Images as Planes. Make sure to select the emission setting when importing, so the dot matrix doesn’t receive shadows or lighting. (Because I think that looks better) We are using CYCLES here, not EEVEE, as it does not handle transparency very well.
Change the settings of the plane’s shader because Jsplacement doesn’t generate the alpha channel exactly:
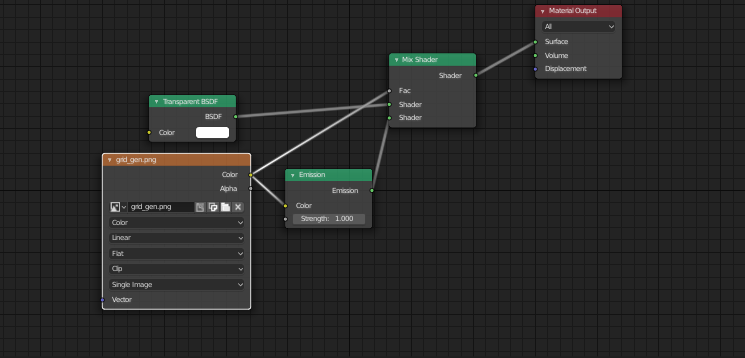
The Fac input for the mix shader originates from the colour output of the texture, not the alpha output!
Next, you can duplicate the grid planes and animate their movement across the camera field ( I > location) by keyframing their position and moving them. This is an optional effect which adds depth to the background.
Add your text in by Add > Text. You can change the font settings so it looks how you want, but I really like the Hack font which you can find here: https://sourcefoundry.org/hack/
Place your text in front of the camera. Now you can animate this too, to make it come in from a side or the top or something, but I’m not going to do that.
Next, create a cloud texture, set to use Cell Fracture that looks like this:
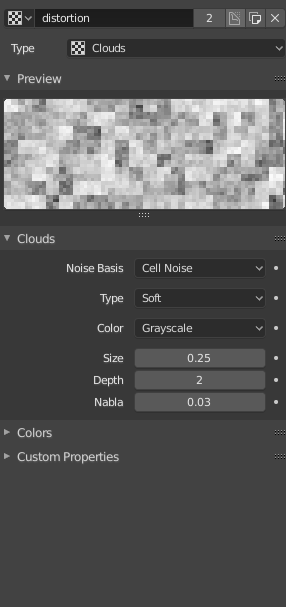
And we’ll use that as the factor input when we mix the two displaced image channels.
The general idea here is that we’re overlaying two images, which are different only because one of them is shifted left a little. Now, if you imagine doing this with a piece of paper, you won’t be able to see the bottom image.
However, we can cut holes into the top paper to reveal sections of the bottom one.
The way we do this is to use this cell noise texture to procedurally create holes (the dark parts of the texture show the bottom sheet of paper, the white parts show the top sheet of paper) and then we can animate it.
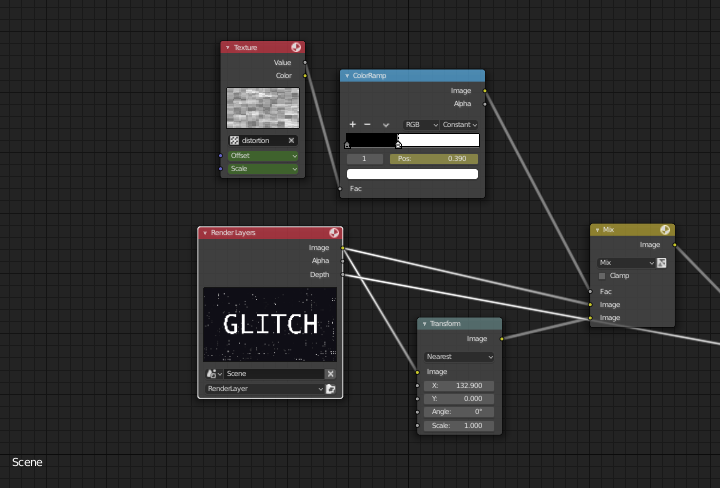
Setup for the glitch effect, ignore the “Depth” line coming out of the Render Layers node for now.
We want only pure white and black to come through, otherwise your distortion will look fuzzy (in a bad way) so we need to make sure to ‘cast’ the distortion texture with a colour ramp node set to CONSTANT. We can animate the positions of the sliders to determine how many ‘holes’ there are in the top sheet.
We can also animate the texture offset and scale options (mouse over the parameter and hit the ‘I’ key to insert a keyframe).
Change these settings randomly and animate them so the keyframes are close together, to make the glitch effect look more spasmodic.
Finally some effects can be used, like Glare, Chromatic Abberation (from the dispersion parameter of the lens distortion), and depth of field (From the defocus node), as well as motion blur. You could animate all these effects too if you wanted, but I’m going to focus on the larger effect.
And that’s the whole tutorial! It’s a pretty simple effect especially once you understand what’s going on, and I hope you enjoy making the glitch effect in Blender! The final node setup is below.
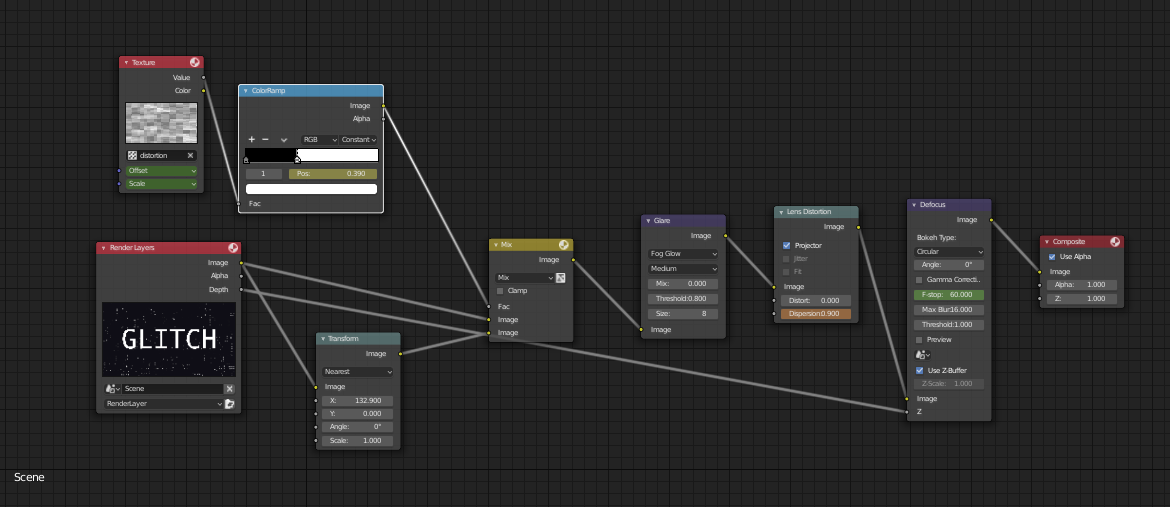
The whole node setup is above.