EEVEE is a crazy powerful rendering engine, but it does have its limitations. Transparency, lack of node support (looking at you, particle info), and especially Object Motion Blur. EEVEE can blur the scene if the camera is moving, using camera motion blur, where objects are uniformly blurred based on the camera’s velocity, but if the camera is stationary, moving objects won’t be blurred.
Also, even the Cycles rendering engine can only handle linear motion blur, not the circular arcs that we’re making (at least, not easily). It would also take many hours to render this scene with Cycles, due to the very large amount of geometry (100K+ verts!).
Take a look at the video if you want a step-by-step walkthrough of how I made this animation.
Video Tutorial
Summary of Procedure
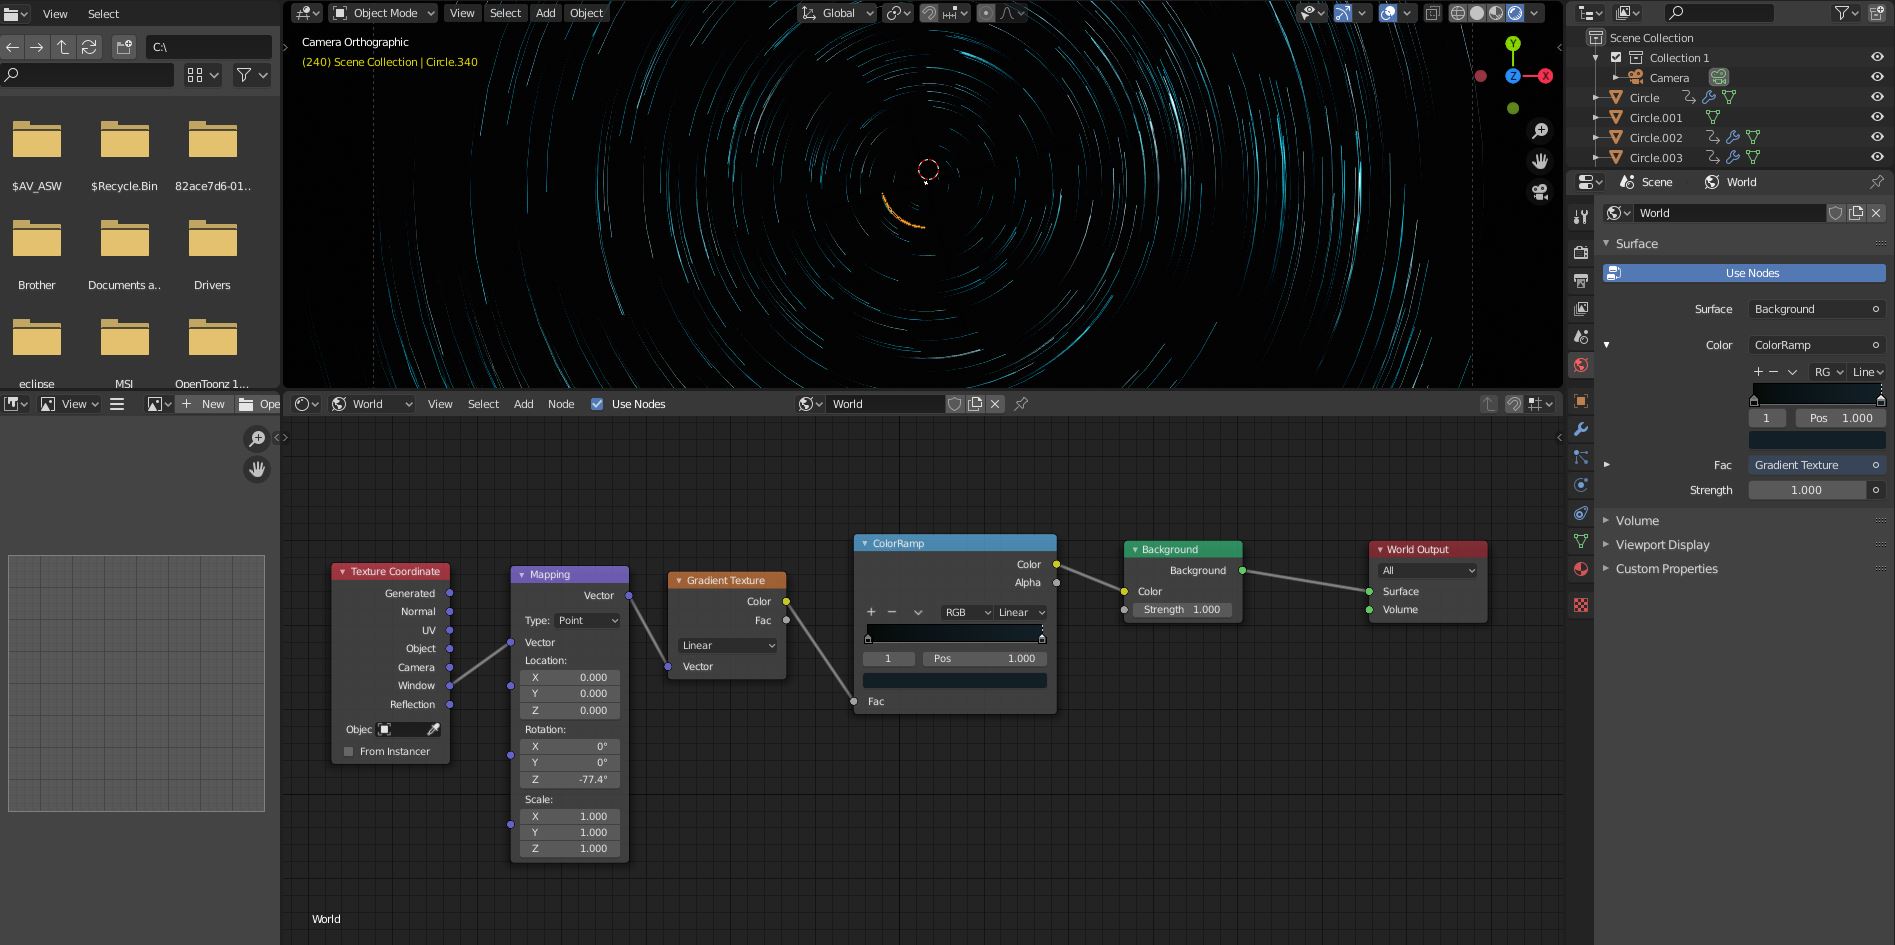
- Set the world material. Depending on the colour grading/compositing at the end, you might not be able to see it, but it’s a good example of making a sky gradient anyways. The node setup is below, and rather simple.
- Add a circle (Shift+A > Mesh > Circle), and turn down the number of vertices from 32 to something between 4 and 16. (There’s a drop down that you should open at the bottom of your screen called “Circle”). This is to save on geometry that we won’t see anyways, and the lower you set the number, the lower the performance cost. Incidentally, this is also how you make regular polygons in Blender (as you can see, 4 vertices forms a square).
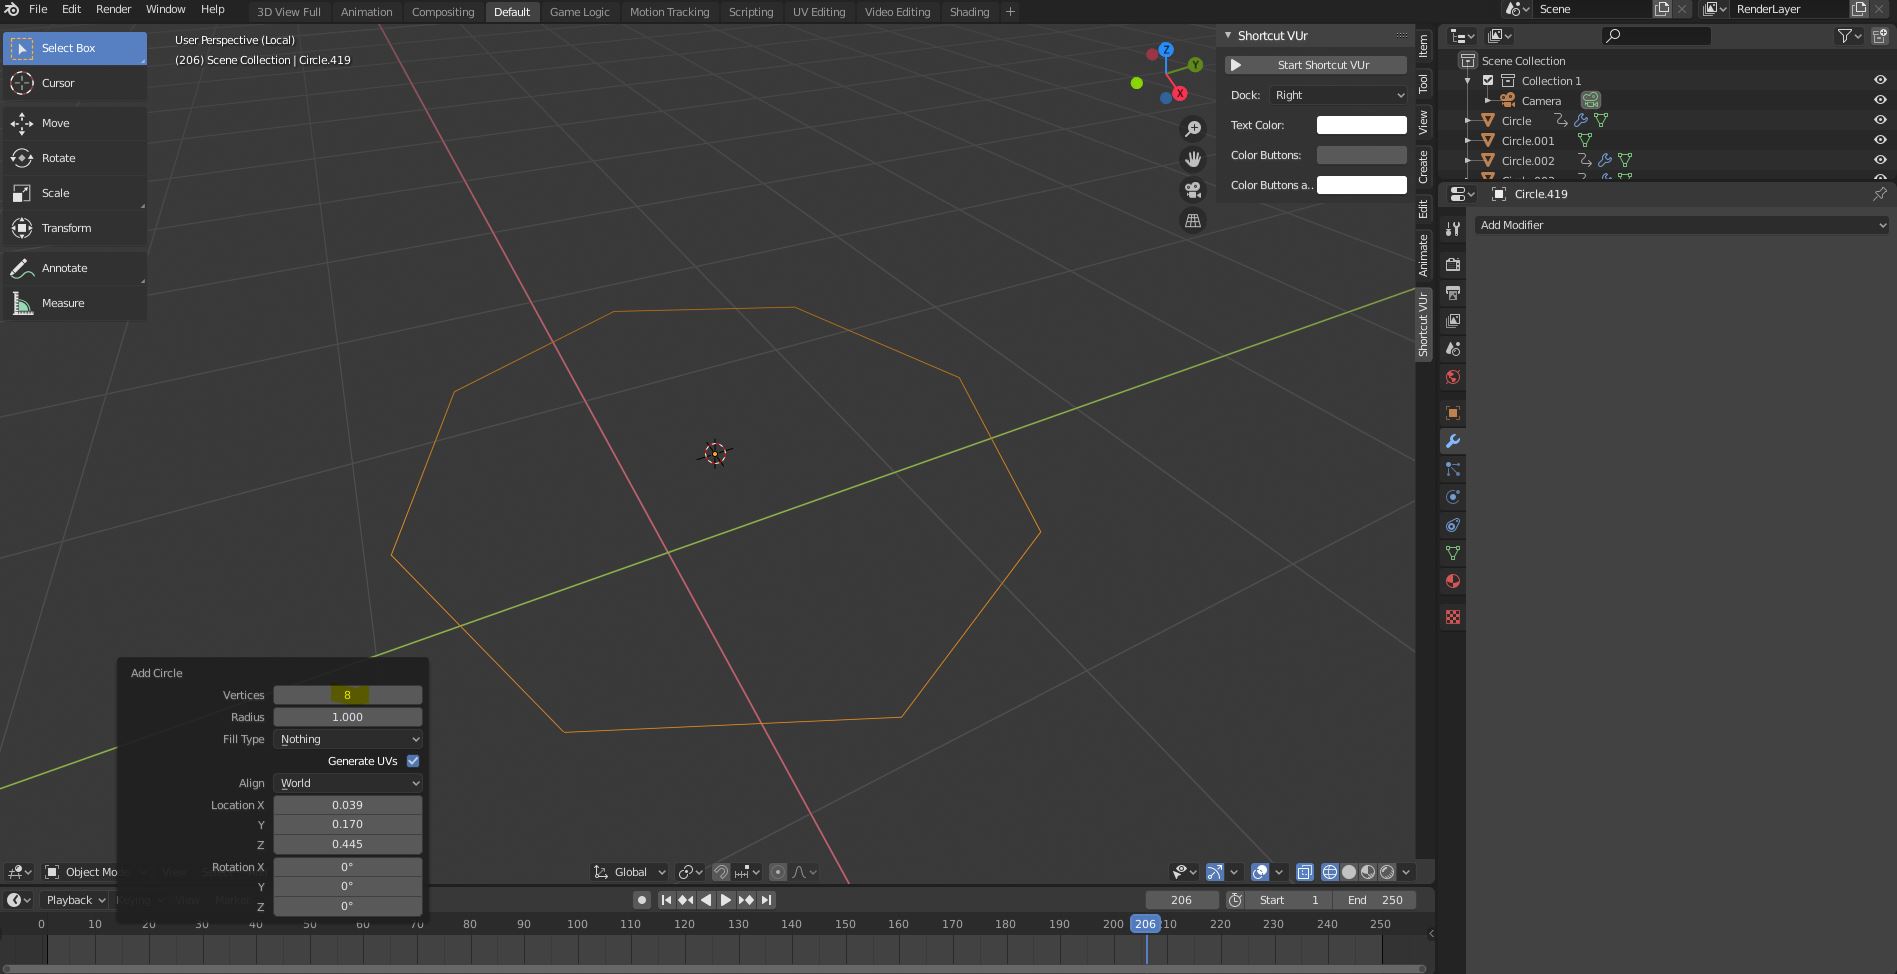
- Create an empty (Shift+A > Empty > Plain Axes), and make sure it’s at the origin of your scene (0,0,0).
- Go into top view (Numpad7) and place the camera there by Ctrl+Alt+Numpad0. Set it to ORTHOGRAPHIC projection (camera settings tab). This is very important, as it allows us to preserve the illusion of circularity and prevents the foreshortening that comes with perspective abuse (like we’re about to do).
- Scale down the circle (fill it also, if it’s not already filled) to something roughly star sized, from the perspective of the camera (Numpad0).
- Apply a screw modifier with the following settings. Make sure you’re on frame 1.

- Go to frame 240 (or whatever you want the last frame to be) and add in another keyframe for the angle (I set it at 75 degrees) - don’t set this too high! Otherwise the scene will get far too crowded.
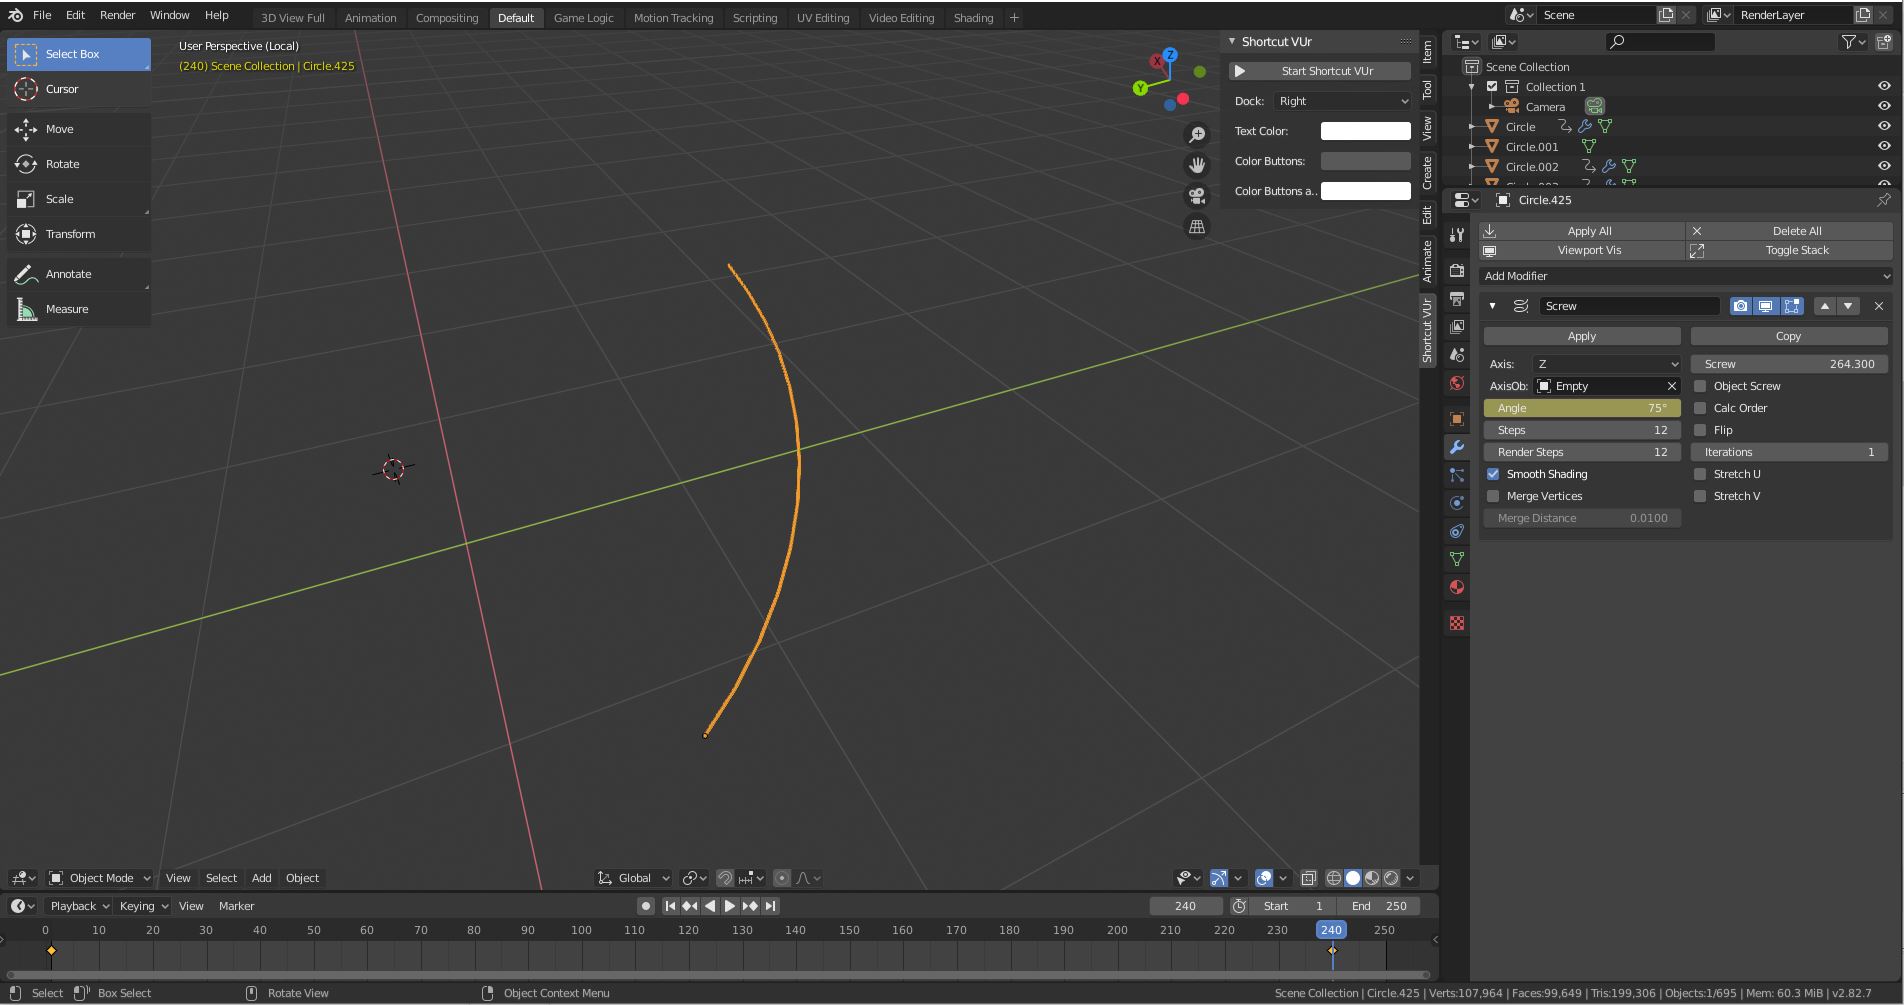 You’ll see that it makes a helical segment, and when viewed from the camera perspective, it forms a circular arc. Move it around the scene to see how the arc is always centered on the empty from step 3.
 - Apply the star material - Here’s where the crux of the idea is:
Since our “star” is really a hairlike spiral, which spirals upwards clockwise (or counterclockwise) and upwards. Now, since the tip of our star, its “current location”, has the “highest” position, which is to say the greatest Z coordinate, we can use this to map a gradient going from dark (low Z) to bright (high Z).
Here’s the material setup:
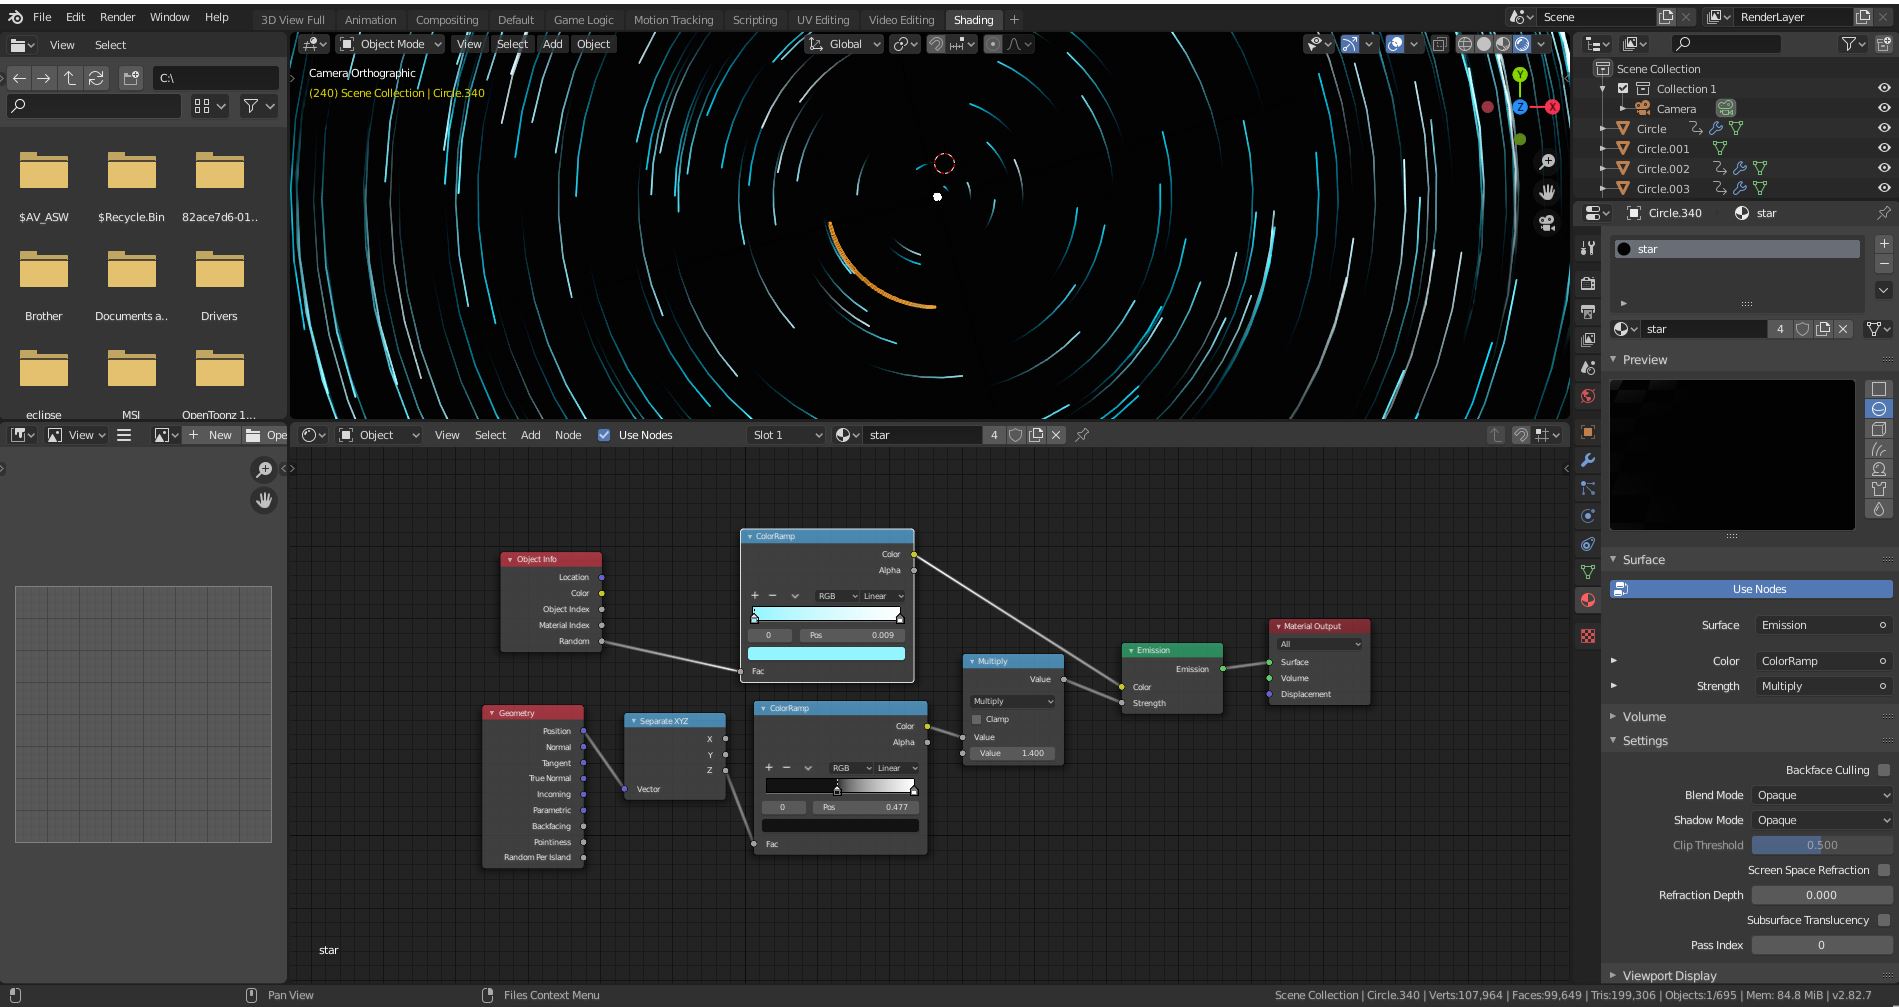 Encoding the position in the Z coordinate, then extracting it out with the Separate XYZ node and modulating the effect with a colourramp. Colour is randomized with the Object Info node.
Once you do this, you may have to move your star up or down (on the Z axis) to see the effect more clearly.
Now, instance duplicate with Alt+D, not Shift+D. This will create instances of the original object which will imiatate all changes to the original, which saves memory as you really only have one object rather than a thousand. You want to instance duplicate each “star” filament until you have enough to fill the screen. My scene has about 800 of these stars, but yours might have a different amount depending on their size. There’s not really any easy way to do this, but you can select large groups of stars and duplicate those rather than doing it one-by-one.
Here’s the final geometry of the scene. You’ll see how it looks like a cloud of helical filaments, rather than points.

Finally, set up some compositing effects. Add bloom if you want to see some glow, and colour grade the lot. Remember, lift alters shadows, gamma alters midtones, and gain alters highlights. Have fun with making this the precise colour you’re looking for.

Conclusion
I hope that you found this tutorial interesting, and that you enjoyed it! Also, this is the second (!) tutorial published on my new site, which I hope you’re all finding faster and prettier than before. Thanks for checking out my site, and bookmark it if you want to check back for new tutorials every two weeks.
For more Blender tutorials, check out my others!