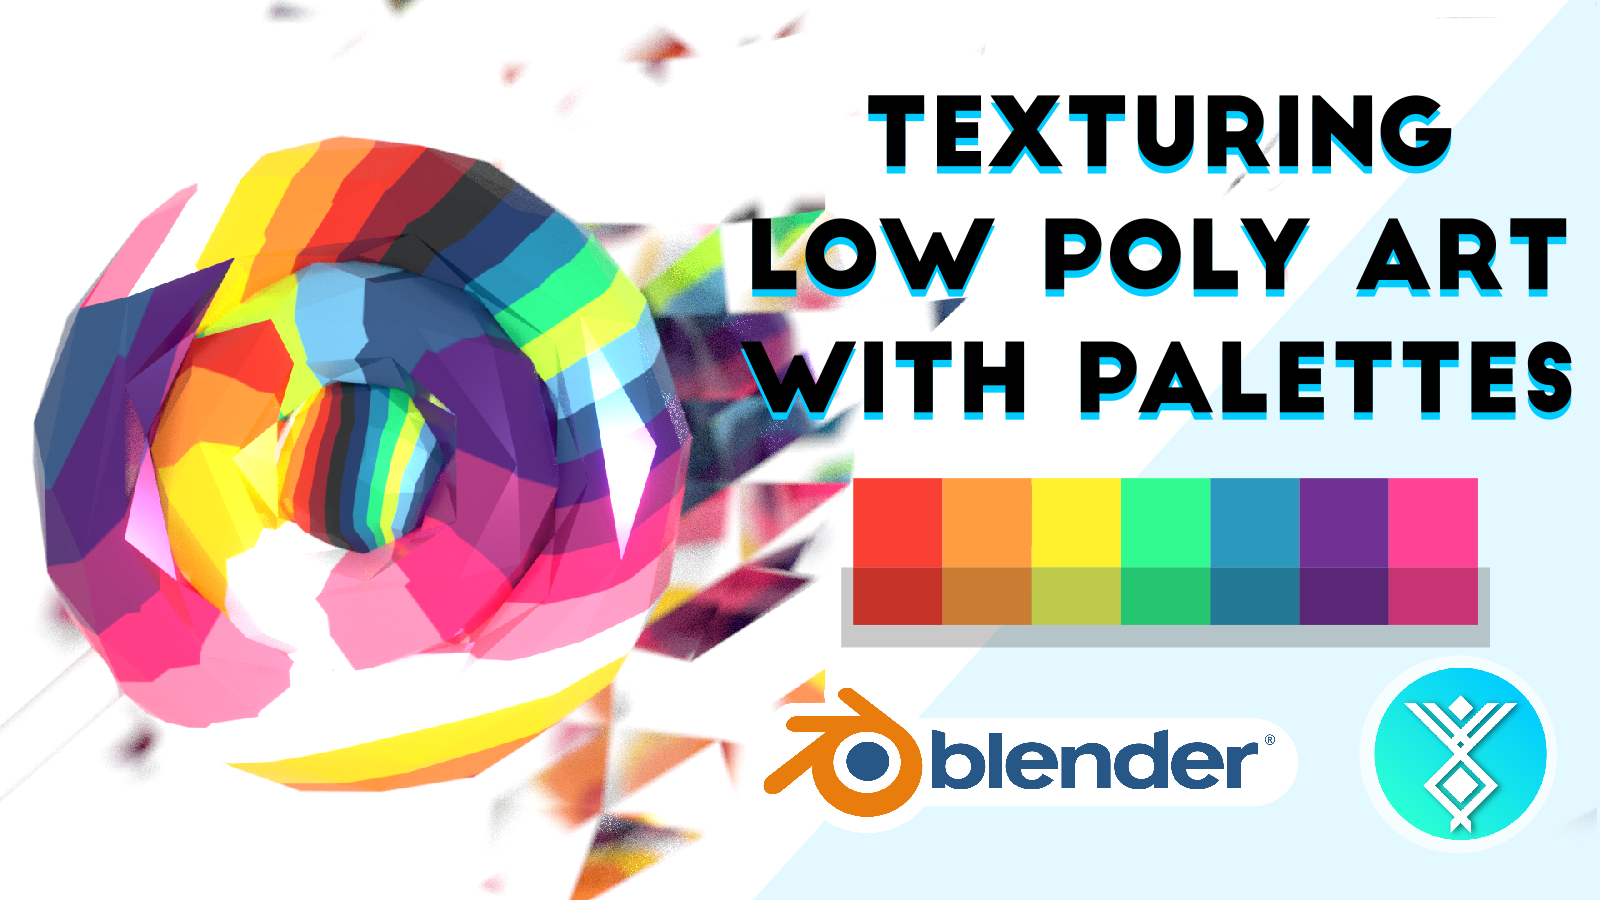
Texturing Low Poly Art with Colour Palettes in Blender

One of my favourite techniques in making low poly art is using colour palettes to texture models. In this Blender low poly tutorial, we’ll learn to model a low poly lollipop with the decimate modifier, UV unwrap it with Blender’s automatic UV tools, and apply a colour palette to texture it. Then, we’ll set up a background and some basic compositing effects to create this background. Finally, I’ll show you a quick and easy trick to animate this texture to make it appear to wrap around the model.

Animated Text Effects (Typography Motion Graphics)

Making motion graphics effects in Blender is a lot of fun, and can lead you to create some pretty cool effects. Since motion graphics are typically done in 2D, having Blender’s 3D tools provides an extra layer of functionality to many effects you might want to make, and allows us to construct some effects fairly quickly and easily. I’ve already made one tutorial on animated motion graphics in Blender, which goes over non-text effects like spirals, starbursts and pops.

Five Easy Motion Graphics Effects in Blender (in 15 Minutes!)

Motion graphics effects are ubiquitous in modern video editing, and can often make the difference between a mediocre video and a polished, professional result. Typically, motion graphics software like Adobe After Effects can be expensive (thousands of dollars, subscription based models), and difficult to learn. These 2D effects come in a variety of styles, and all be replicated using the free Blender software, which also provides incredible flexibility and an extremely powerful modelling/animation suite to generate effects.

Animated Star Spirals - Long Exposure Curvilinear Motion Blur In EEVEE

EEVEE is a crazy powerful rendering engine, but it does have its limitations. Transparency, lack of node support (looking at you, particle info), and especially Object Motion Blur. EEVEE can blur the scene if the camera is moving, using camera motion blur, where objects are uniformly blurred based on the camera’s velocity, but if the camera is stationary, moving objects won’t be blurred. Also, even the Cycles rendering engine can only handle linear motion blur, not the circular arcs that we’re making (at least, not easily).

Making a Weapon Scope in Blender (Hardsurface Modelling Workflow)

I’ll be going over some important hardsurface modelling techniques to create a sci-fi weapon scope (and laser!) in Blender. These don’t require you to have HardOps or any other paid addons, so this tutorial should be accessible to everyone. I will go over the whole workflow, from the shape blockout, hardsurface modelling, detail modelling, shading, texturing, lighting and rendering, so get comfortable. Design As a first step, I drew a small sketch of a potential model, after being inspired by this railgun by Nicholas Cort.

Making de_dust2 in Blender – Part 2: Low Poly Materials & Lighting

Introduction We’re making de_dust2 in Blender in the low poly style, and this tutorial goes over tips for adding colour, higher resolution details and setting up a low poly scene. If you just got here, you can find the first part (Basemesh modelling) here. Video Tutorial Text Summary Here’s a few tips that you might find useful, that I’ve learned over the course of making this. 1. You can use a basemesh to great effect, by setting its viewport-display property to wire or bounds (Object settings), and then replace it with a higher resolution model.

Writing a Game Design Document [Trac3 Devlog #1]

I’ve been working on a game about electronics and information security for about two months now, and I’ve finally completed a game design document for it. Here’s a quick video preview of what the game looks like. It’s got two enemies (one isn’t shown here), a very programatically convoluted spawning system, two logic gate towers, and a rather limited sense of progression. Trac3 was going to be designed with rather unconventional genre in mind - a roguelite tower-defense-arena-shooter with elements of strategy and RPG-style character progression, played on progressively more complex PCBs and circuits.

Making de_dust2 in Blender - Part 1: Super Low Poly

This week, we’re taking a look at one of the greatest FPS maps of all time: the Counter Strike franchise’s Dust II. It’s been around for a really long time (think March 2001), and is set in sunny Morocco. I’m going to be laying out a low poly version of bombsite B, and this first video will go over the broad strokes of the map, defining the overall sense of scale and orientation of the scene.

Programming a Unit Obfuscator in Python

I’ve recently had the idea to build a calculator that can take a unit, like seconds, and obfuscate it to some arbitrary level by multiplying and dividing by a stack of different units. Since we’re just multiplying and dividing by units that will, eventually, cancel, we can also take each unit to an arbitrary positive or negative power (though I think fractional exponents are probably likely to cause some interesting problems with display).

A Guide to Lazy Progress/Healthbars in Unity

Delayed, or lazy progress bars have become more popular recently and have been implemented in a lot of games. They’re a very simple UI component to implement, and I thought I could make a quick tutorial showing you how to create a prototype that can be easily added into your game. This is what it looks like in my project: TRACE , a game about riding the copper traces along circuit boards in a rather frenetic top-down arena shooter.

Setting up Git and Unity (Workflow Guide)

Introduction Git is a highly versatile and powerful tool for source control and collaboration, which makes it incredibly useful for Unity development. If you’re unfamiliar with this, here are some use cases I can think of off the top of my head: If you have multiple computers, (say, a laptop and desktop) and want to work on a project using both of them, while having the project files synced between them If you’re working on a project with a partner or group, and want a way to sync your work without uploading and downloading a million files to Google Drive or Dropbox If you want a log of previous versions of your project and some way to revert to them, or implement experimental features that _might_ break your code If any of these apply to you, read on!

The Ultimate Guide to Custom Cursors in Unity

In this tutorial, you’ll learn how to create custom cursors that follow your mouse in Unity. This used mostly for 2D games, particularly arcade style games, RPG’s and top down shooting. Custom cursors are easy to implement in Unity, and we will need minimal coding as most of the structure is already set up for us. What We’re Making (Cursor Video Demo) Day 4: Trac3 Video Demo + Custom Crosshair Cursor

A Guide to Making a Robot Character in Blender: Materials and Scene Composition

Welcome to the final part of our Blender Robot Character tutorial. We’ll be going over how to create some photorealistic and stylized materials, decals, setting up the overall composition, and building a minimal environment to render our model. This is the fourth, and final section of this tutorial series. Modelling I Rigging (Using IK) Modelling II (Details & Kitbashing) Materials and Environment Setup Starting Resources We’ll be using a carbon fibre material to texture our robot.

A Guide to Making a Robot Character in Blender: Modelling Details

In this tutorial, we’re going to add some details to our robot character in Blender. We’ll be learning how to efficiently create connecting cables, vents, beveled edges, and armor plating, along with other surface details. We’ll be making extensive use of these modifiers and tools in this tutorial. Bevel Knife tool (+ Knife Snapping) BoolTool addon Bezier Curves This is the third tutorial of four in the series.

The Best 3 Ingredient Sweet Iced Tea

Alright, here’s my first recipe tutorial. It’s a bit of a diversion from my usual content but hopefully you find this helpful. This sweet iced tea recipe requires minimal effort, costs almost nothing to make, and is easily scalable. You’ll need a glass mason jar (500 ml), some black tea bags or loose black tea, sugar and water. First, add about 3 spoonfuls of sugar to the jar. Then, put in the tea.

A Guide to Making a Robot Character in Blender: Rigging

Welcome to my new Robot Character series, where I’ll guide you to making a fully rigged and polished robot character in Blender 2.8. This series will be split into a few sections. This is part 2. Modelling I Rigging (Using IK) Modelling II (Details & Kitbashing) Materials and Environment Setup NOTE: Before doing this, you should have the model from the first tutorial. We’ll be setting up an armature rig and if your model is different, the bone placement and IK settings will differ and might not work correctly.